Tuesday, March 22, 2011

Illustrate a Vector Lifesaver From Scratch

 
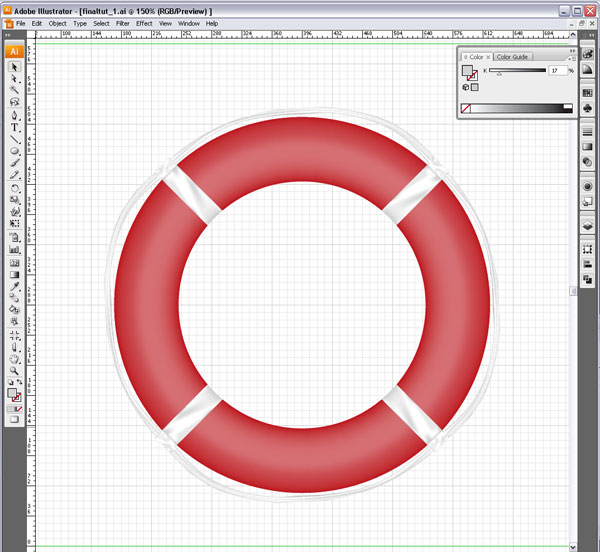
In this tutorial, we’ll create a unique lifesaver that can be used as an icon or design element. We’ll be working with the Pathfinder Tools to create the shapes. The Mesh Tool will help us to apply the color and highlights to give our object the desired “realistic” look. We’ll also take advantage of the Duplicate and Rotate Tools, so we get a balanced look.

Step 1

First, create a new document in Illustrator at 800 pixels by 600 pixels. Enable the Ruler (Ctrl+R) and turn on the grid on (Ctrl+"). Then drag a horizontal and a vertical guide onto the artboard.
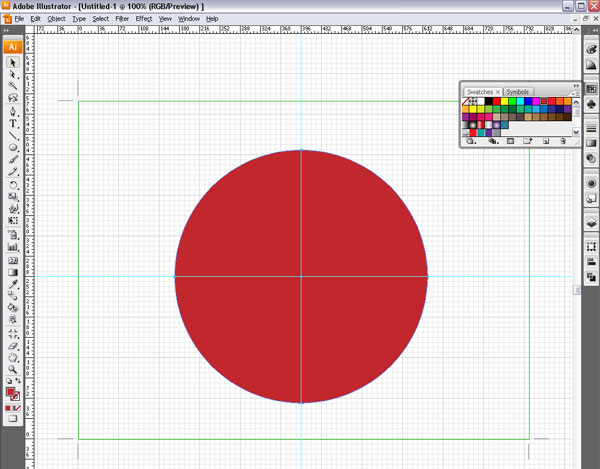
We’ll start by creating our shapes. Select the Ellipse Tool (L), and click on the center point of our guides. Then drag outwards by holding down the Shift + Ctrl keys. This will give us a circle that is centered on the grid/guides. Fill the circle with a red color (R=190 G=28 G=35) and leave the stroke empty.
undefined

Step 2

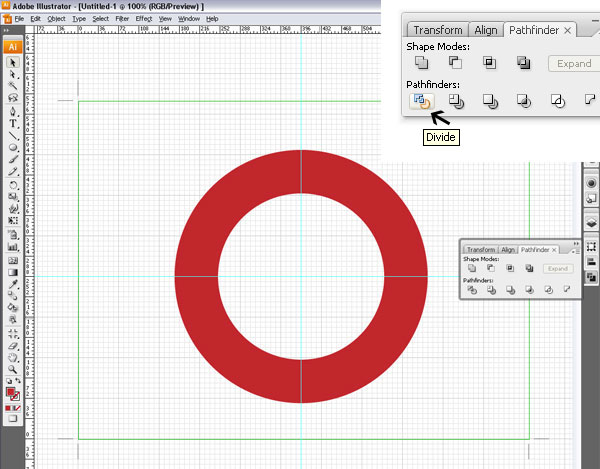
Create another circle, as in the previous step. Then make it about 75% smaller then the first circle. Give it another color so it is easy to see. Select both circles, open the Pathfinder Palette, and click on the Divide Tool. Deselect the shapes, then re-select the smaller circle, and then delete it.
Step 3

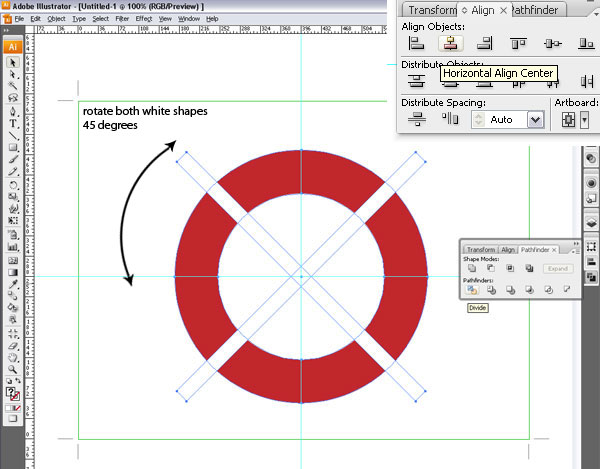
Create a rectangle about 25px wide by 600px high. Then fill it with white and leave the stroke empty. Select both the circle and the rectangle with the black arrow tool. Click one time on the circle (to indicate that this is your base for alignment).
Then open the Align Palette. Click on the Horizontal Center Button and then on the Vertical Center Button. This will center the rectangle with the circle. Now repeat this step and set it perpendicular to the first rectangle. Select both of the rectangles and rotate them 45 degrees.
Step 4

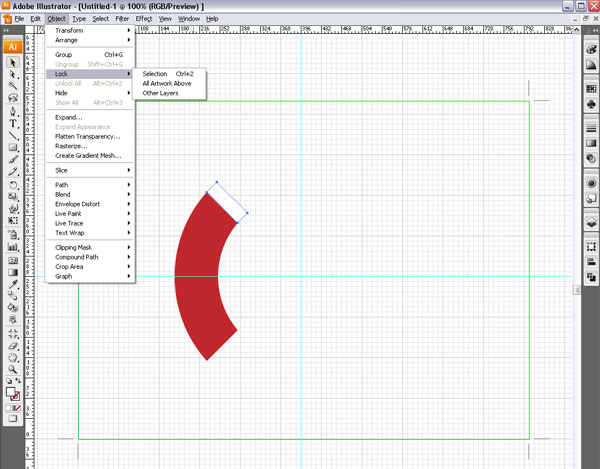
Select all of your objects. Then open the Pathfinder Palette and click on the Divide Tool. We’ll delete most of the shapes now. We need only two. After we apply the mesh tool, all we have to do is duplicate them.
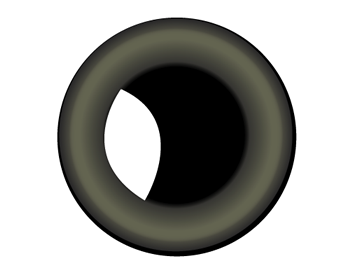
Delete all the shapes until you have a quarter circle with a white shape left on your art board, as in the image below. Once you have done that, select the white shape, and Lock (Command+2) it. This will allow us to apply the mesh tool to the red shape without the white shape interfering.
Step 5

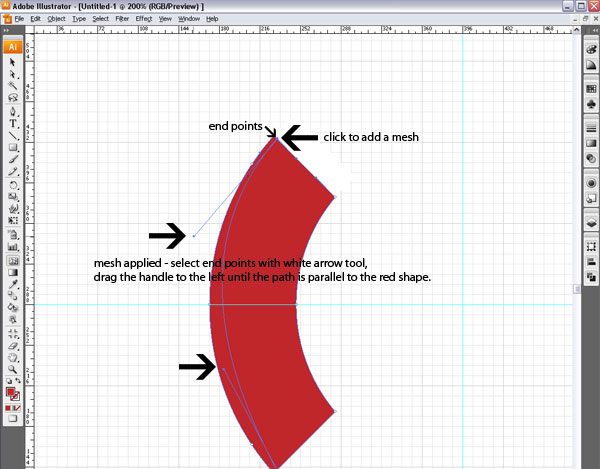
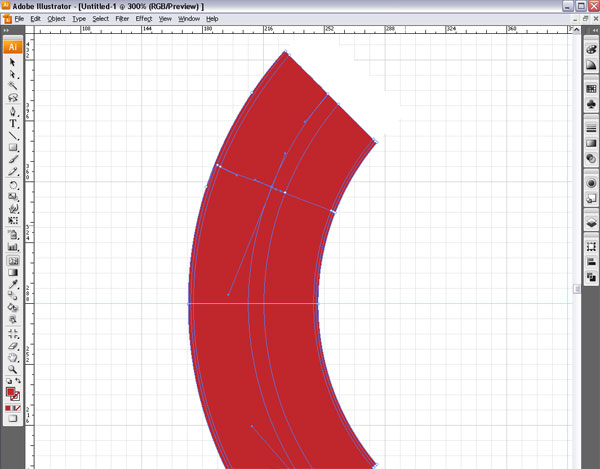
Now we’ll apply the Mesh Tool. Select the red shape with the black arrow. Make sure no color is selected (no fill and no stroke). Then select the Mesh Tool (U), and move it over the top path of the red shape. You’ll see a “+” which indicates that we will add a mesh.
Click on the path to add the mesh, then select the white arrow tool, and select the end point. This makes the handle visible. Start dragging it until the mesh path is parallel to the shape’s outline. Repeat this with each end point. Add a few more Mesh Paths (U).
Step 6

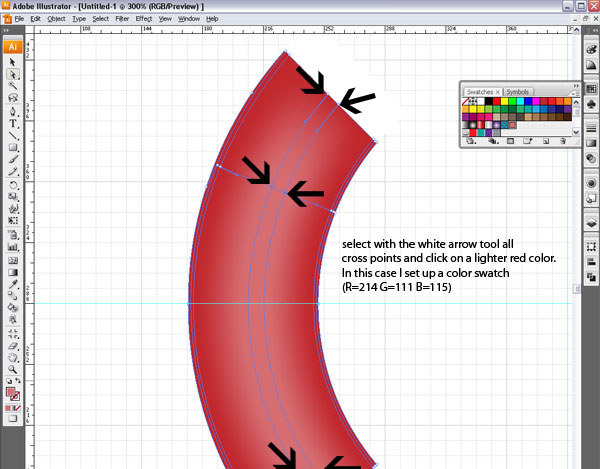
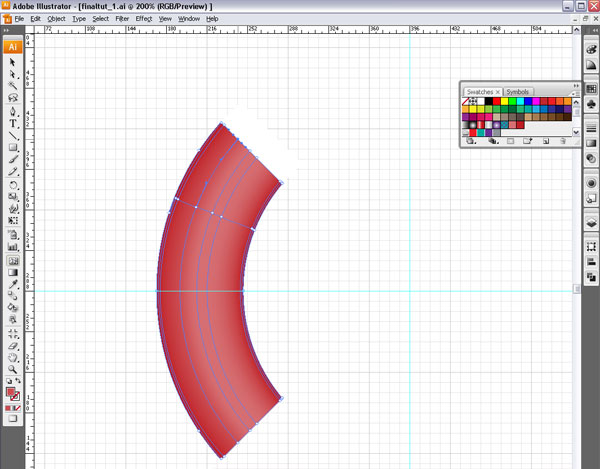
Now we’ll add some highlights. I set up a slightly lighter red as a color swatch (R=214 G=111 B=115). Then select the cross points of the two Mesh Paths with the White Arrow Tool. Click on your color swatch. This adds a gradient to the mesh and works perfect with elliptical objects.
The color choices are of course optional. Once that is done and you think it needs some more depth, you can add another mesh path. Simply make sure that the lighter color is selected, and click with the Mesh Tool on the red shape.
Step 7

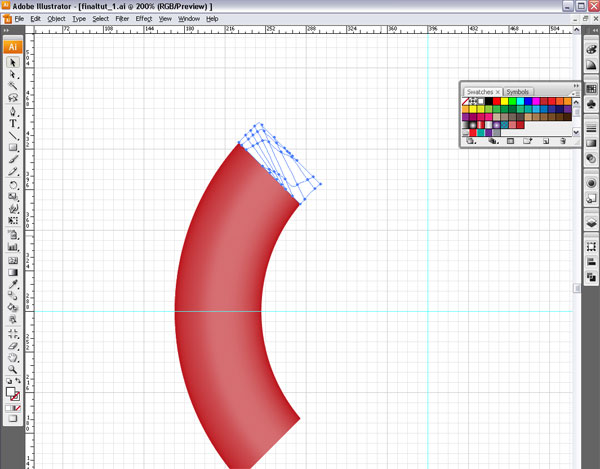
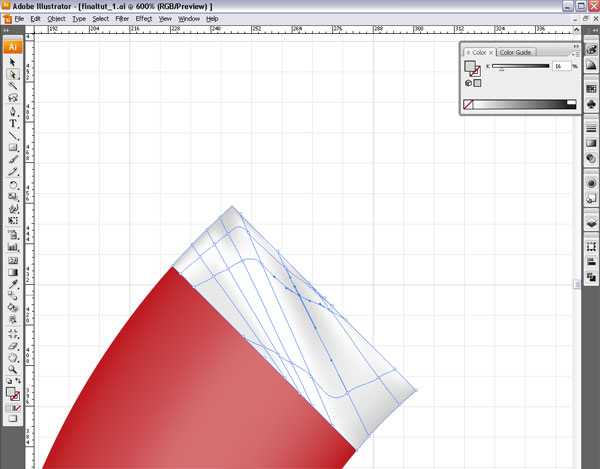
In this step, we will repeat the use of the Mesh Tool on the white shape. Unlock all your shapes. Select the Mesh Tool (U). Then add Mesh Paths to your white shape. Select the Anchor Points and add some grey. I chose different shades of grey so it looks a little bit more realistic.
Step 8

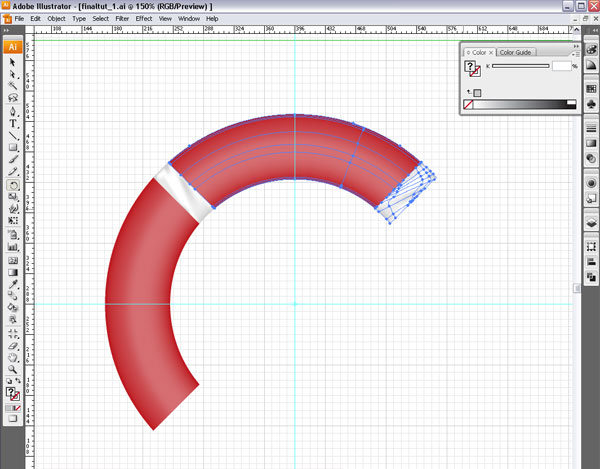
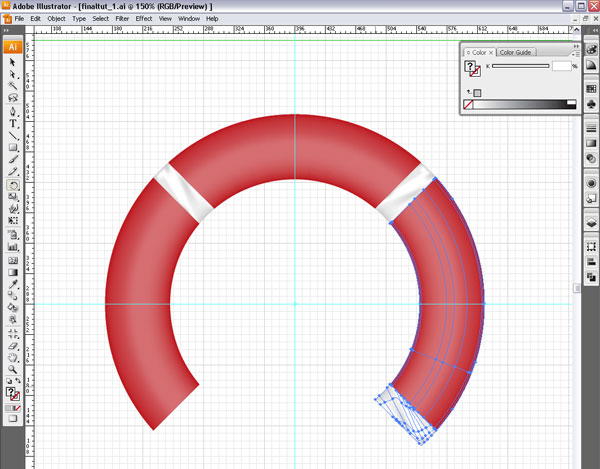
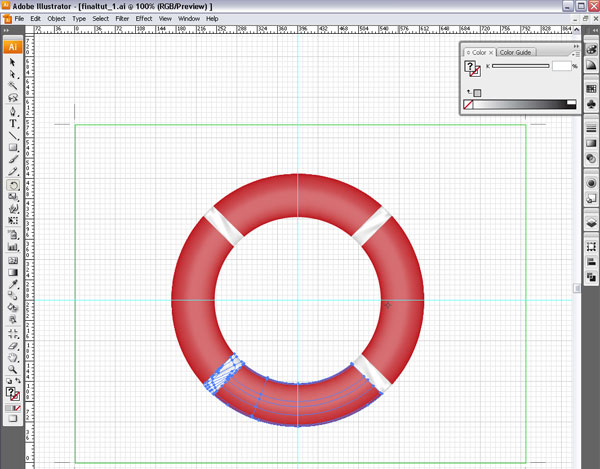
Now we have created our most important shapes and are ready to built the full lifesaver. With the Rotate Tool still selected, hold down the Ctrl key. Then move the cursor over your selected shape. You will see a black and white arrow (overlapping).
Hold down the Shift Key, while still holding the Ctrl key. Hold down the left mouse button and drag your object clockwise. This will duplicate and rotate (in 45 degrees steps) the objects. Let go of the mouse. Do not deselect the object. Then hit Command+D twice to duplicate this step two more times. You will see your lifesaver getting built!
Step 9

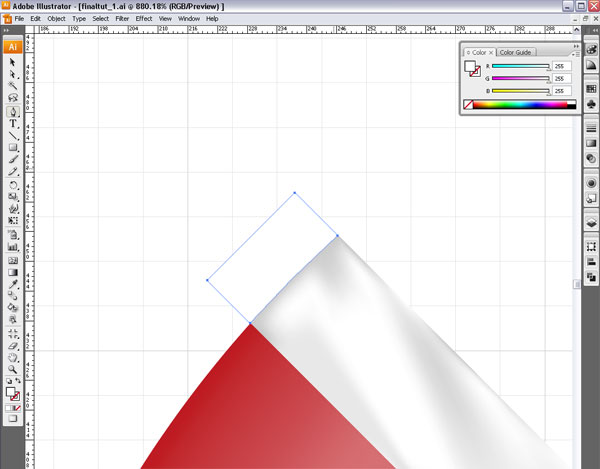
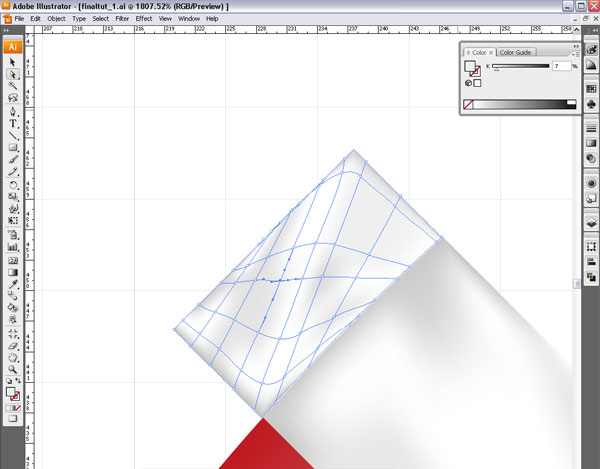
Now that we have created the lifesaver, it’s time to add the cord. Create a rectangle with the Pen Tool, like the one you see in the picture below. Select the mesh tool (U) again. Then add Mesh Paths and apply color to the Anchor Points, as we did before. This creates the shape for the cord to run through.
Step 10

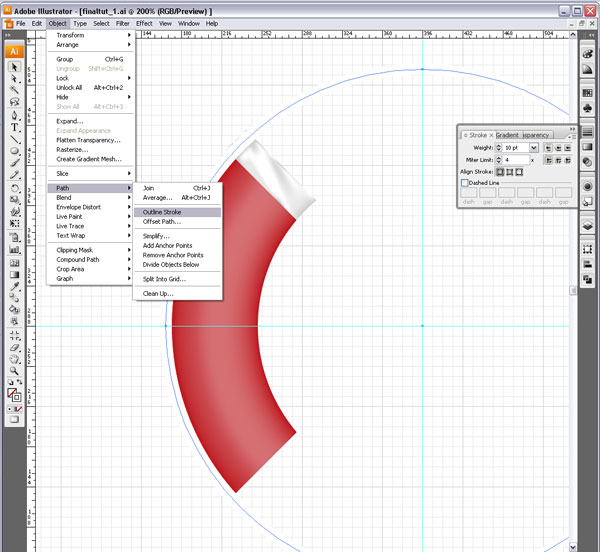
Let’s create the cord. Select the Ellipse Tool (L) and click on the center point of our guides. Hold Shift+Ctrl and drag a circle. Give it a stroke of 10 pixels and no fill. Make it just slightly larger then the life saver. With the object still selected, go to Object > Path > Outline Stroke. This will give us a nice even band that we can manipulate.
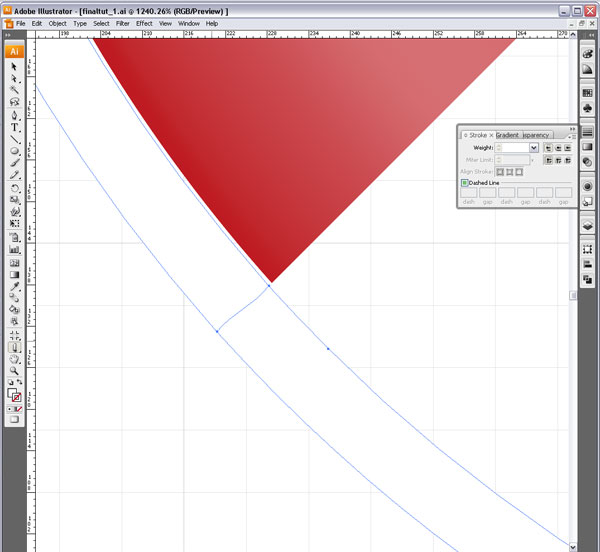
Select the Knife Tool. Then cut the band just near the ends of our quarter piece of lifesaver. For this particular step, I hid the duplicated pieces, so they won’t interfere with my cutting. Then delete the bigger piece.
Step 11

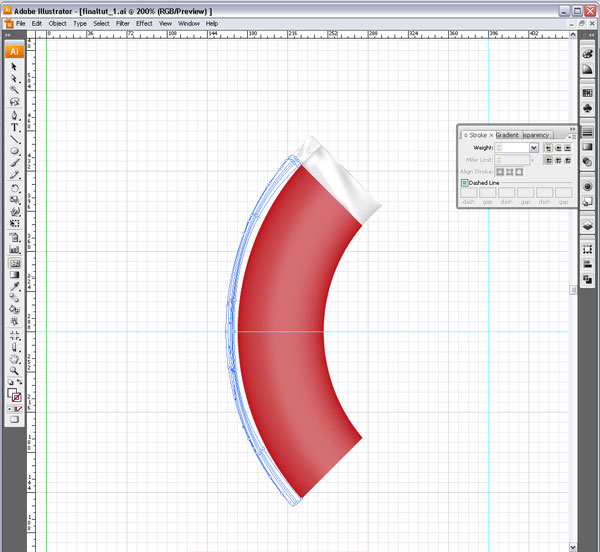
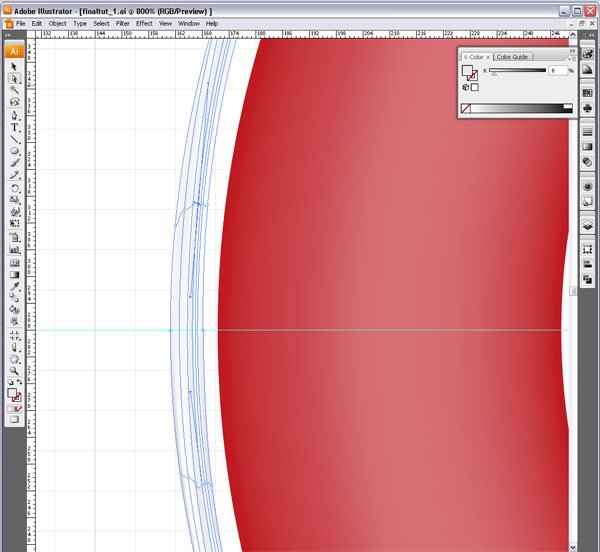
Once we cut our cord into a smaller piece, we can manipulate the shape by selecting the Anchor Points and dragging them slightly. Once again add some Mesh (U) paths and color, just like we did in the previous steps.
Step 12

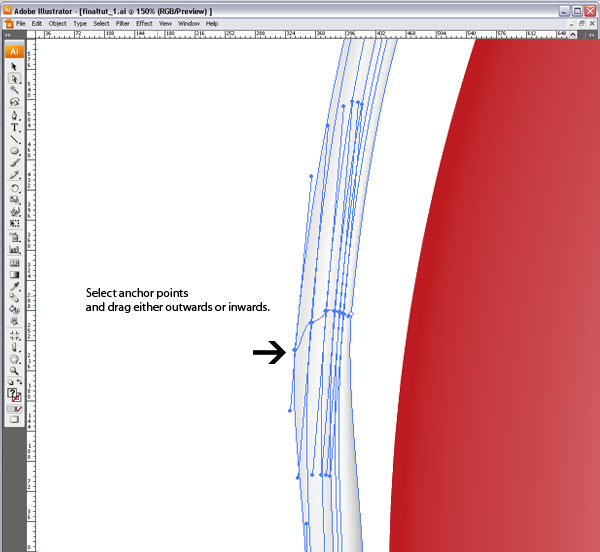
Now we need to add some dynamism to it. Select several anchor points on a vertical line and drag them outwards or inwards. Notice the mesh will move slightly with it. This adds some dimension and dynamism to our cord.
Step 13

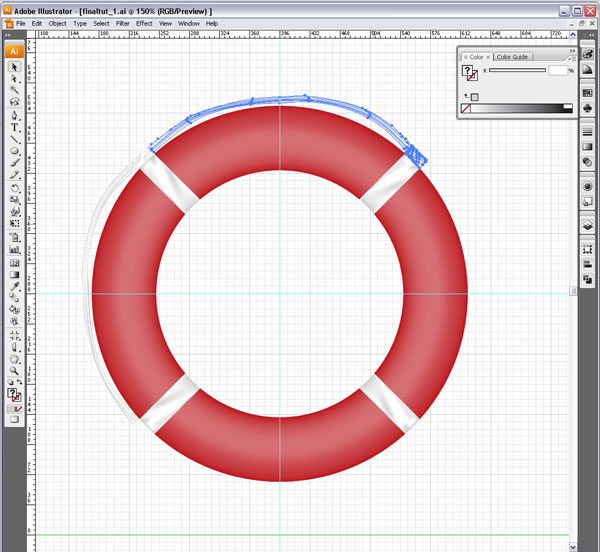
Now we are almost at the final stage. Select the rectangle and the cord, and group them. Keep the selection active, and select the Rotate Tool (R). Then click once on the center of the guides. Hold down the Alt key, and move the cursor over your selected shape.
You will see once again a black and white arrow (overlapping). Again, hold down Shift + Alt, click the left mouse button, and drag your object clockwise. This will duplicate and rotate (in 45 degrees steps) the objects. Let go of the mouse. Do not deselect the object. Then hit Command+D twice to duplicate this step two more times. And voilĂ , the lifesaver vector shape is complete!
Step 14

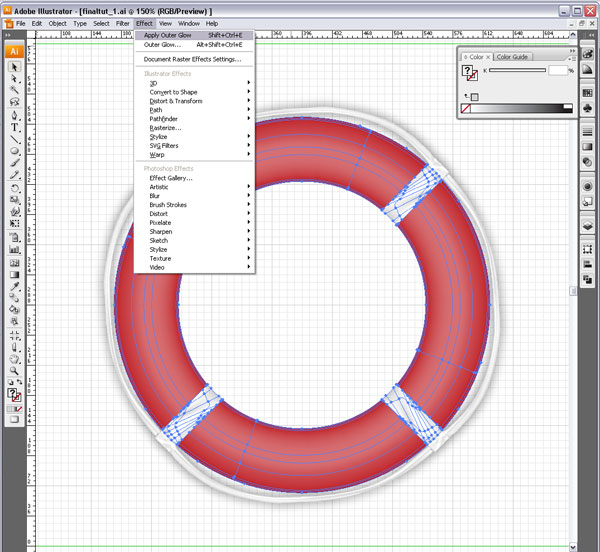
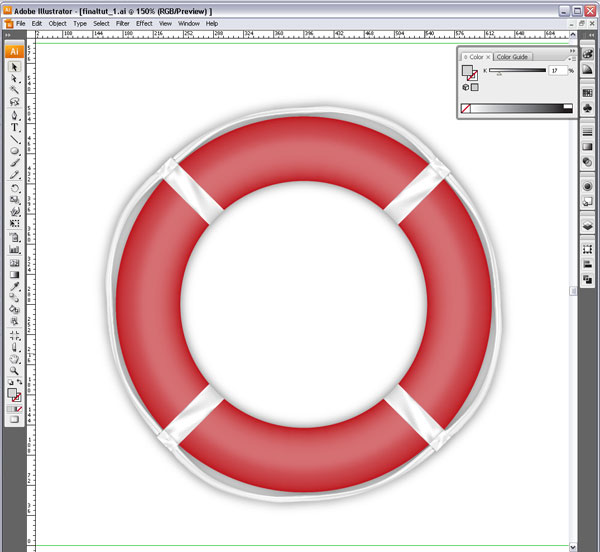
Last but not least, add some glow to give some life to it. Select all the objects and add an outer glow by going to Effects > Stylize > Outer Glow.
Conclusion

After adding some final text, that completes the design of our lifesaver from scratch!

undefined

Creating Realistic Texture and a Sharp Vector Knife

 
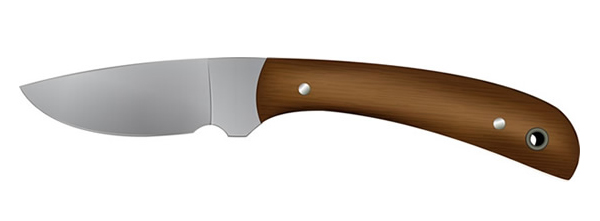
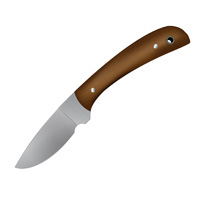
Creating convincing vectors can be a daunting task. I will show you how to make wood and metal textures for a vector knife using the Gradient Mesh Tool, layering Gradients, and the Pathfinder Tools.

Step 1

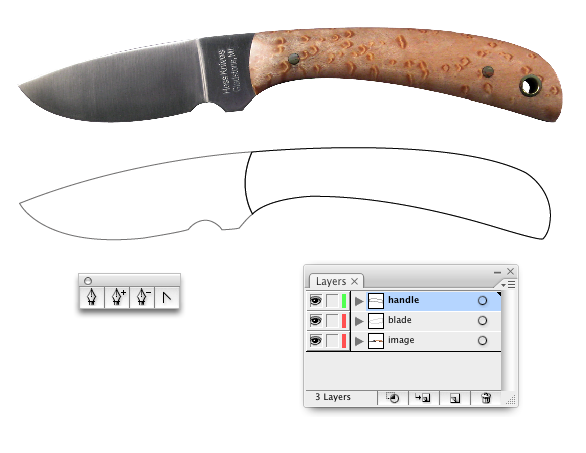
First, download the picture I took of a knife. Then using the Pen Tool, outline the shape of the knife. Then put the "blade" and "handle" shapes on different layers.
undefined

Step 2

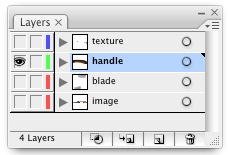
Hide the blade layer and select the handle. Make a copy of the handle on a new layer and name it "texture." Hide the texture layer for now.

Step 3

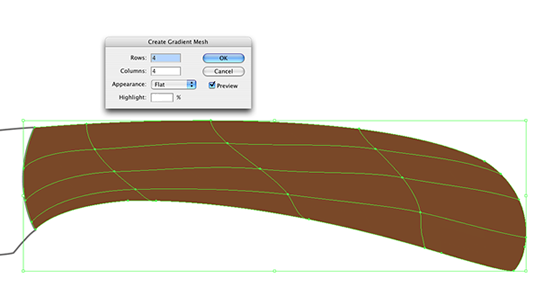
Select the handle and make the fill #8C6239 with no stroke. Go to Object > Create Gradient Mesh. Set it up with 4 rows, 4 columns, and flat.

Step 4

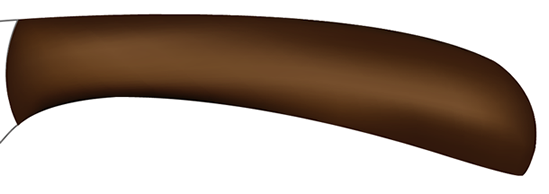
Select your Gradient Mesh Tool and click any point around the edge. Change the color of the point to #331E16. You can control the gradient much like the curve on the Pen Tool. Change the color of every point around the edge of the handle.
You can create more points if you need by clicking off an intersection point. You may have to play around a little to achieve the gradient you want. The final gradient should be similar to the one below.

Step 5

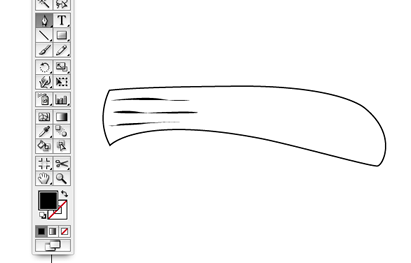
Lock the “handle” layer and then go to your "texture" layer. Select the Pen Tool, with a black fill and no stroke. Make shapes similar to the ones below. Using your Selection Tool, press Alt and drag the shapes to duplicate them.
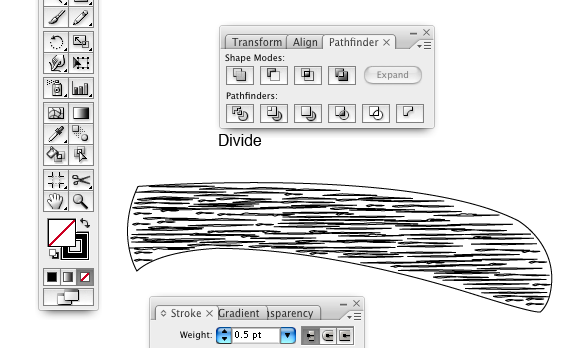
Once it is filled, select all the shapes and press Divide in the Pathfinder Palette. Select the image and set it to a 0.5 pt black stroke with no fill. We use the pathfinder method to make this into one shape. This makes the workflow much easier.

Step 6

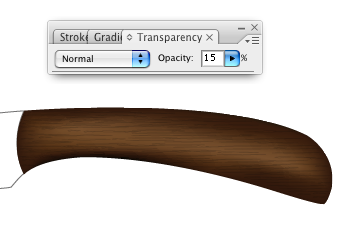
Turn the opacity of the texture layer down to around 15% and make sure the handle layers are lined up.

Step 7

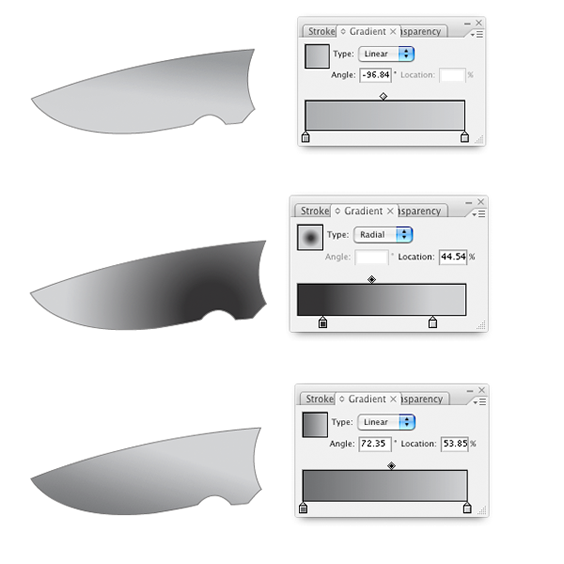
Lock your "handle" layers and go to your "blade" layer. Instead of using a gradient mesh, I will show an alternate method of achieving the same effect. Make three copies of your blade and apply a gradient similar to the ones shown below. We will use the third copy in an upcoming step. The top blade is your original so keep the opacity at 100%. The second two blades you can turn down to around 30%.

Step 8

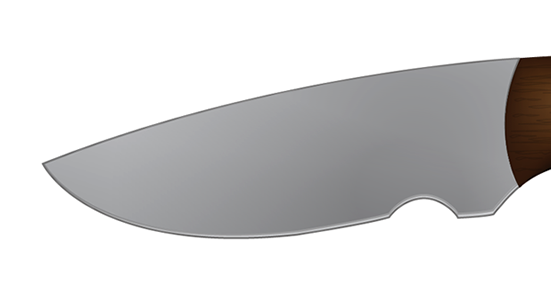
Line up the second two blades on the original. Resize them slightly so they are lying just above the original. This will give the blade some dimension.

Step 9

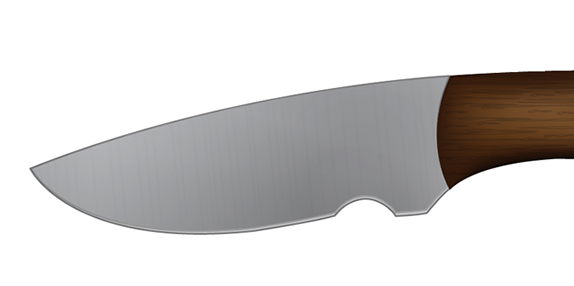
On the third copy of the blade we are going to repeat Step 5 to make the texture of the metal.

Step 10

Line up the texture to the original blade and turn the Opacity down to around 2%.

Step 11

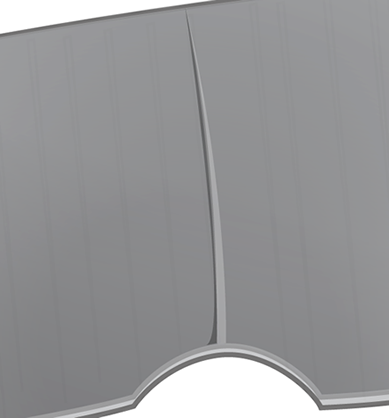
Create a new layer for the last details. Select your Pen Tool and make a black and a white shape, as shown below. Turn the Opacity down on them to 25%.

Step 12

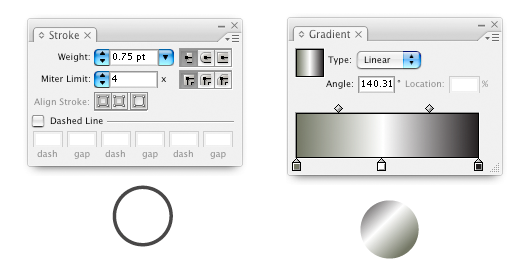
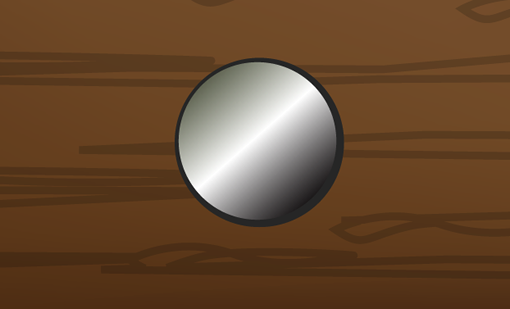
Select the Ellipse Tool and create two 10 pt circles. Set one with a .75 pt stroke and the other with no stroke. Create a linear gradient similar to the one shown below. Position the stroke behind the gradient slightly off center for dimension.

Step 13

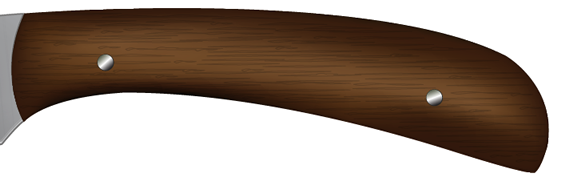
Make a copy of the shape from Step 12 and position it accordingly.

Step 14

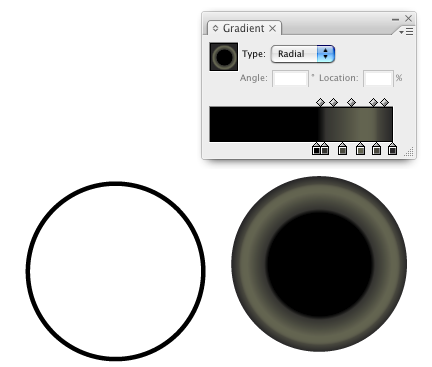
Repeat Step 12 with a 15 pt circle. Your color choice does not have to be the same as mine, but you should have the same order. Start with a dark color and keep selecting lighter colors. Then fade back to dark.

Step 15

Use your Pen Tool to make a shape with a white fill and no stroke like the one below. Position the shape in the appropriate spot.

Conclusion

Creating realistic textures may take a little time to achieve, but it’s rewarding once completed. I hope you enjoyed the tutorial!
undefined

Create an iPhone Style Vector Phone Illustration

 
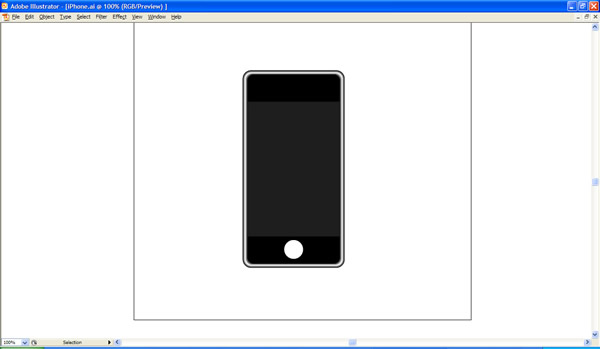
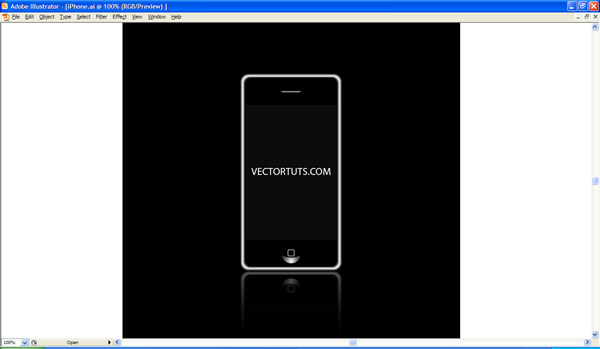
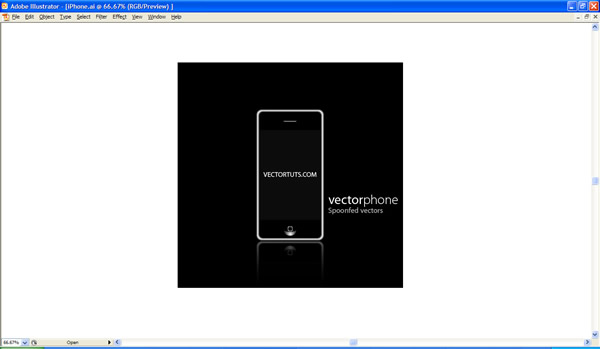
Today, I’ll show you how to quickly create a mockup of an iPhone in Illustrator. Surprisingly, this process is very easy in Illustrator. Once you’re done, you’ll have a scalable, layerable, and fully editable graphic to place in any of your designs.

Step 1

Lets get started by creating a 10 in by 10 in document. The dimensions you choose shouldn’t matter, but it might help to choose the same dimensions just to follow along with this tutorial.

Step 2

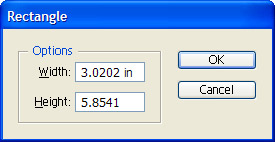
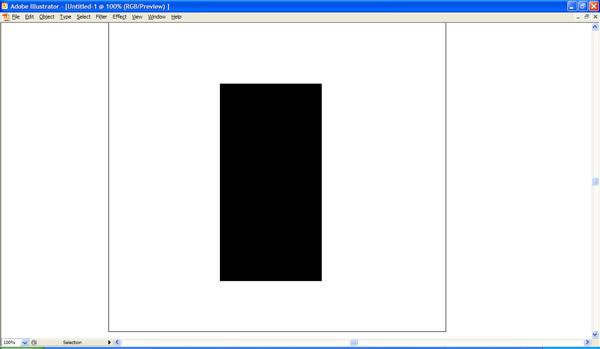
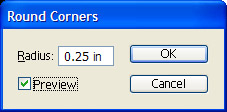
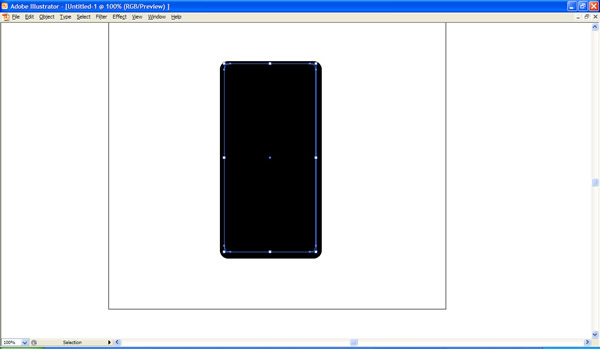
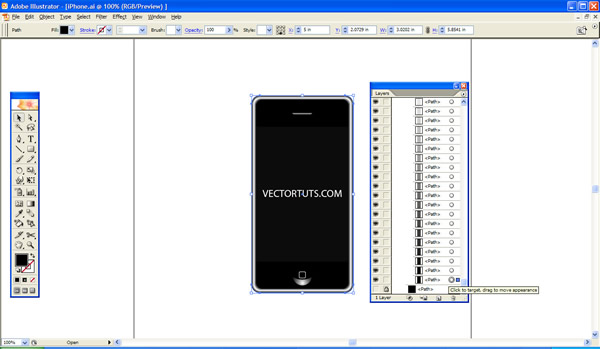
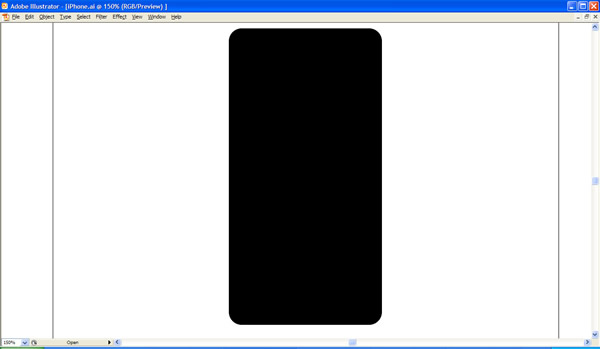
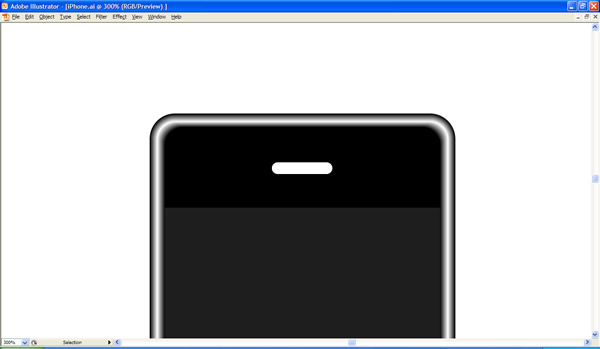
Draw a black rectangle 3.0202 in by 5.8541 in. You can do this easily by selecting the rectangle tool and by clicking anywhere on the art board. Now go to Effect > Stylize > Rounded Corners. Enter a Radius of 0.25. Now go to Object > Expand Appearance. This will convert the shape to outlines.
undefined
undefined

Step 3

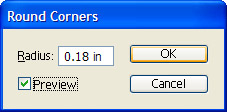
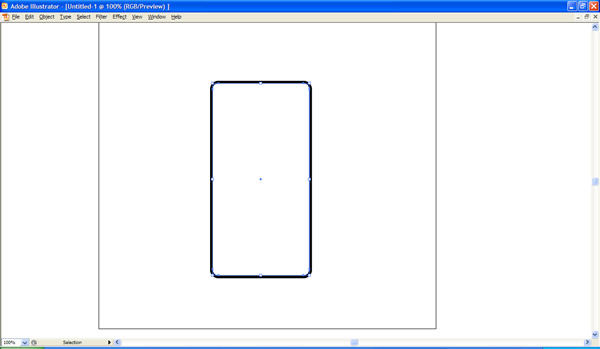
Now draw a second black rectangle 2.7219 in by 5.5866 in. Repeat the steps above to round the corners. Enter a radius of 0.18. Now go to Object > Expand Appearance.

Step 4

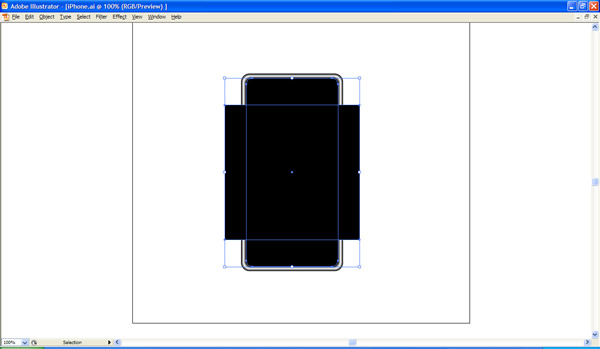
Select the rectangle you created in Step 3. Copy this object and paste to front. Change this object’s color to white and adjust its size as shown below. You can do this by selecting the points with the direct selection tool and by nudging them over with your arrow keys.
Now align all three rectangles that we created in Steps 2 – 4 to their horizontal and vertical centers. Move this layer behind the object we created in the previous step.

Step 5

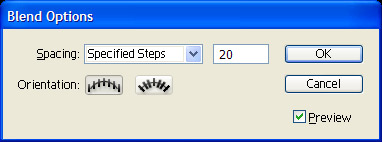
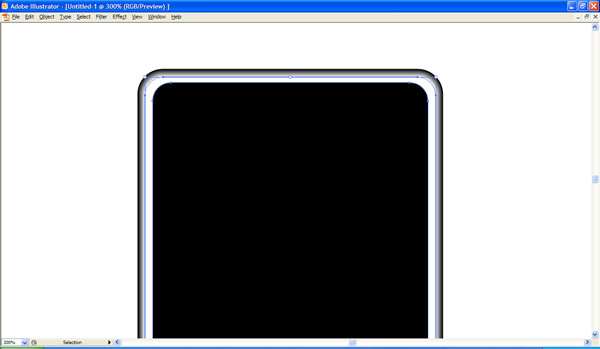
Now we’re going to use Illustrator’s blend tool to create the iPhone’s rim. Go to Object > Blend > Blend Options. Select specified steps and enter 20. Select the largest white rectangle that we created in Step 2 and the middle sized black rectangle that we created in Step 4. Then go to Object > Blend > Make. This will blend both these object together.

Step 6

Now with the blend still selected go to Object > Expand and check both Object and Fill. Now ungroup all the layers twice so that they are all separate objects.
Now select both the top most object that we just ungrouped and the rectangle that we created in Step 3. Repeat the steps above to blend these two objects together. Make sure to expand and ungroup this blend as well.

Step 7

Now we’ll create the screen. Select the top most black rectangle that we just created. Copy it and paste it to front. Now draw a second rectangle that is 3.9938 inches tall but wider than the rectangle we just copied. Select both objects and choose intersect shape areas in the pathfinder palette. Then change the color to (#0C0C0C).

Step 8

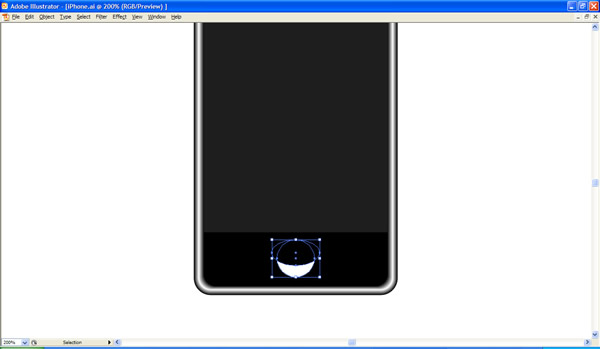
Now let’s create the button at the bottom. Draw a white circle 0.5555 in by 0.5555 in and place it as shown. Then copy this circle and paste to front. Now adjust the new circle until the path is as shown. Select both objects and select Subtract from Shape Area in the Pathfinder Palette.

Step 9

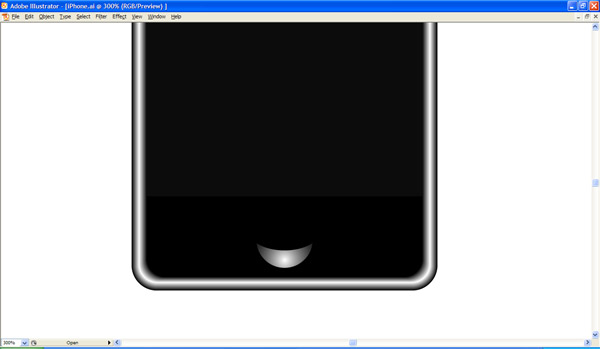
Add a radial gradient from white to black as shown to finish this object off.


Step 10

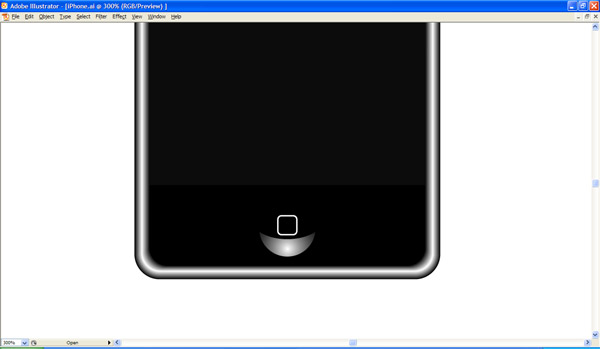
Now draw a square, as shown below. Then go to Effects > Stylize > Round Corners. Enter 0.035 inches as the radius. Then remove the fill and create a white 1 pt stroke.

Step 11

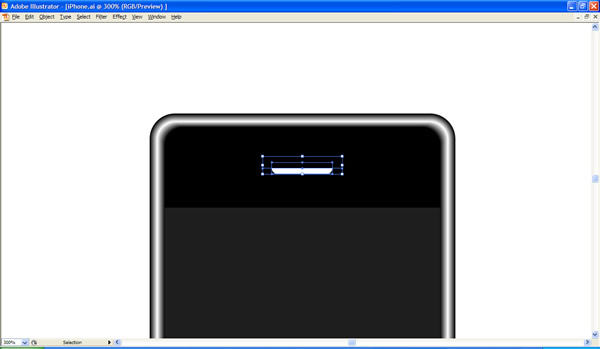
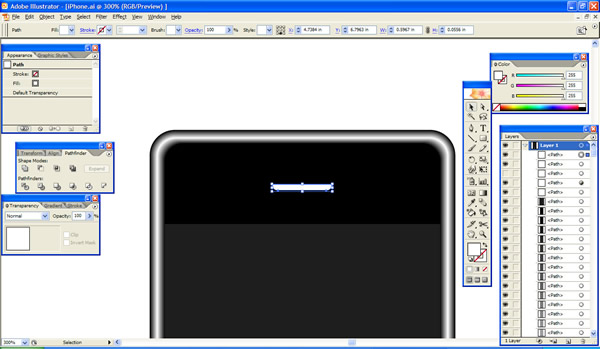
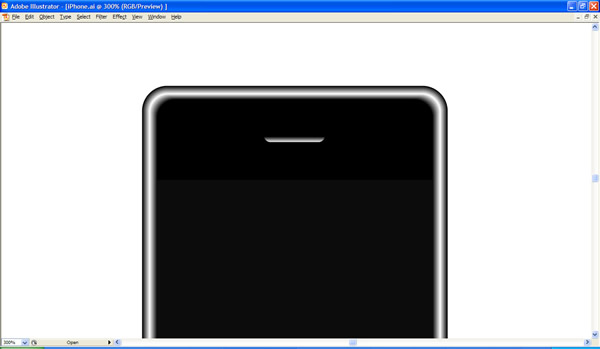
To create the speaker at the top draw a square. Round the corners by using the same steps as above. Enter in a radius of 0.08. Now expand this object’s appearance.
Draw another rectangle on top of this object, as shown below. Then select both objects and click Subtract from Shape Area in the Pathfinder Palette. Then add a linear gradient from white to black.

Step 12

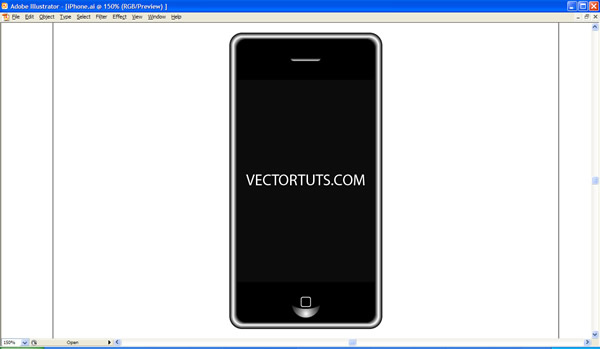
Now place your artwork on the screen. You can do this in a number of ways. In this tutorial, I placed some simple text over the screen area. If you wanted to place your own artwork here you could either re-size or crop it to fit. You could use the screen that we created as a clipping mask. Choose whatever method works best for you.

Step 13

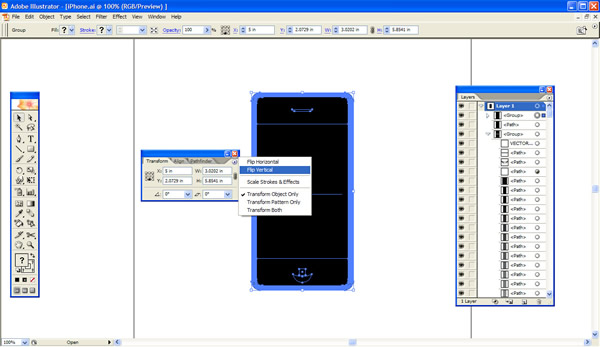
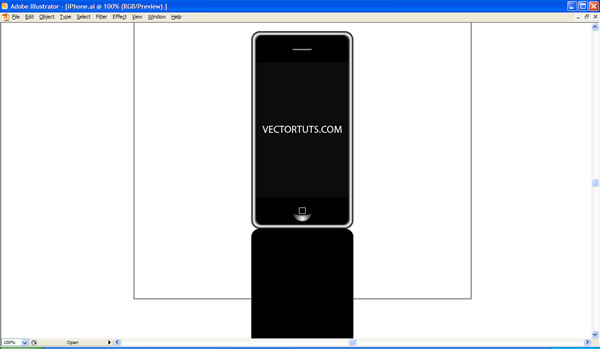
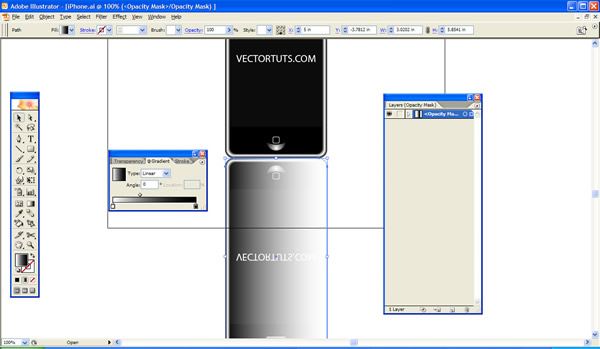
Now we’re ready to create our reflection. Group all the objects that make up the phone. Open up the layer palette and expand the group we just created. Select the bottom-most black square that we created in Step 2. Copy this object and paste to front. This will cover up the entire graphic, as shown below.

Step 14

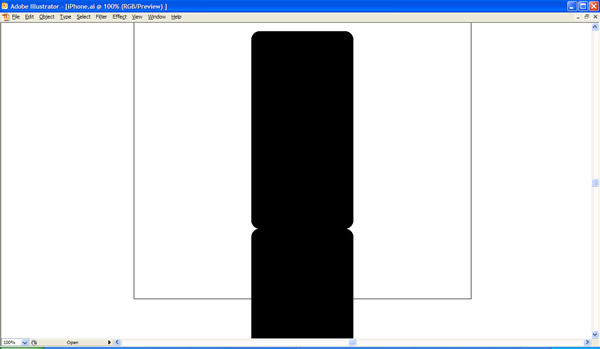
Now select all objects that make up the phone plus the black rounded rectangle that we just created. Copy them all and paste them to front. Then group the copy. With the copy still selected, open the Transform Palette and in the flyout menu select flip vertical.

Step 15

You can now delete the object covering up the top phone.

Step 16

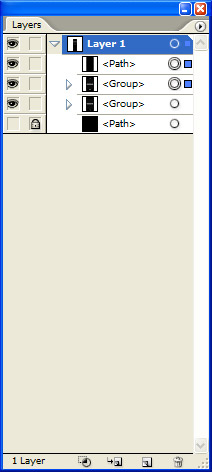
Select the vertically flipped objects that we just created and ungroup them. You should now have a black rounded rectangle in one. You should also have a group that contains the objects making up the phone.

Step 17

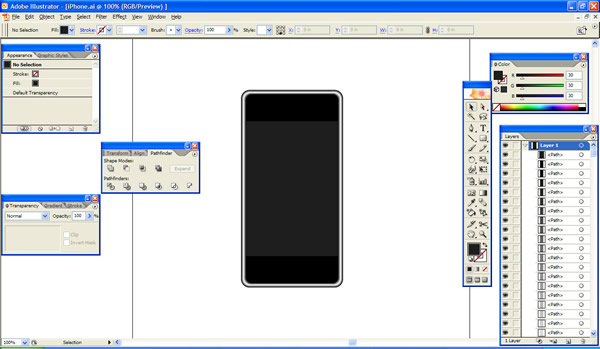
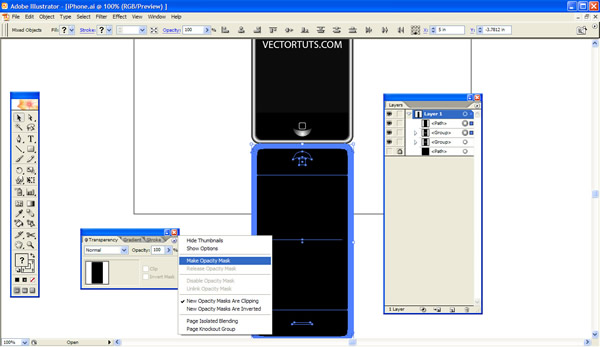
Select both objects. Then open the Transparency Palette and select Make Opacity Mask. This will make the reflection disappear.

Step 18

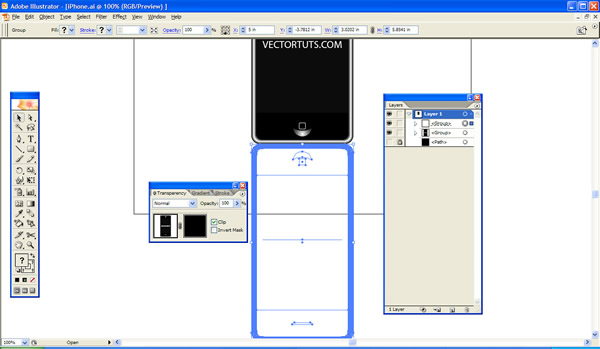
In the Transparency Palette, you should see two thumbnails. Click on the black one. Then open the gradient palette and select linear. This will cause the Object to reappear, but fading from left to right. Select the gradient tool and create a vertical gradient as shown.
Now click onto the other thumbnail in the Transparency Palette. This is essential, otherwise Illustrator won’t let you out of the mask. Adjust the overall transparency of this object to 30% or 40%.

Step 19

Now we’re ready to draw our background. Create a black square 10 in by 10 in. Place it appropriately and lock it in place.

Step 20

Now type out the text. Use the Myriad Pro font to replicate the look.

Conclusion

Creating an iPhone from scratch is easier than it looks. I hope that you enjoyed this tutorial and learned something from it. Also, have fun creating new iPhone wallpapers for all the new iPhone users to display within this iPhone design.
undefined