Step 1
Create a new document. With the Ellipse Tool (L), make a circle 25px by 25px. Fill it with red and no Stroke.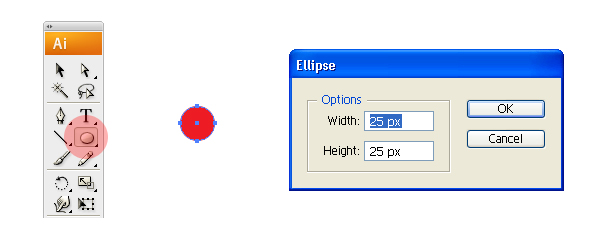
Step 2
Select the circle and go to Effect > 3D > Revolve. Enter the values as shown in the figure below. A Revolve angle of 180 degree is to make a semi-ring. An offset of 100pt from the right edge adds a distance between the revolve axis and the path on which the object will revolve.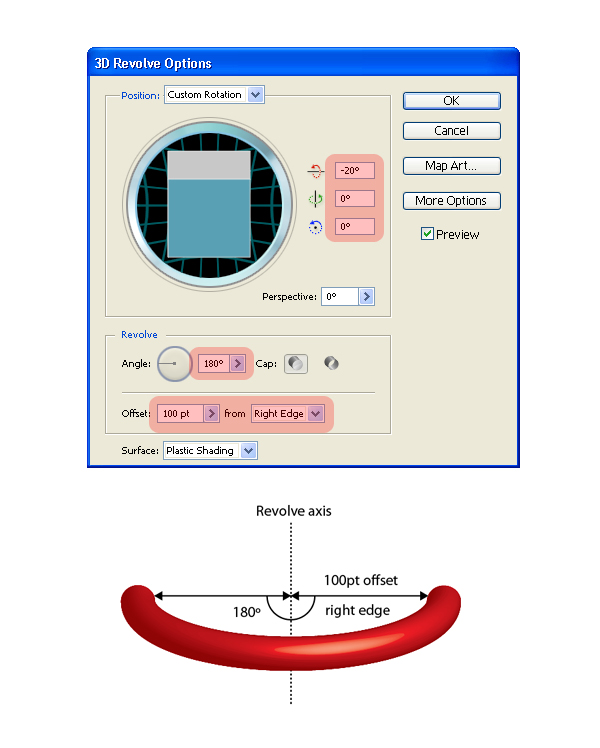
Step 3
Now we’ll duplicate and Send to Back. Alt-drag the ring to make a duplicate copy as shown. Use Command + Shift + Left Bracket to send it back.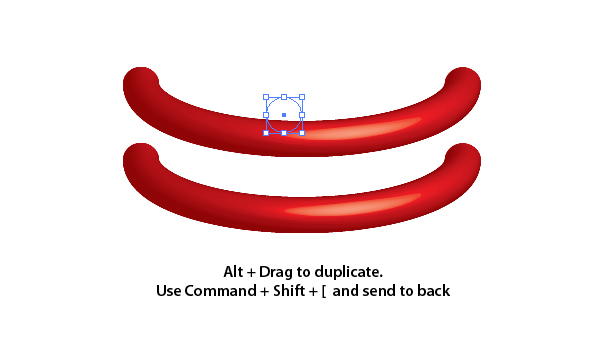
Step 4
With the duplicate copy still selected, open the Appearance palette (Shift + F6). Double-click the 3D Revolve effect, as shown below.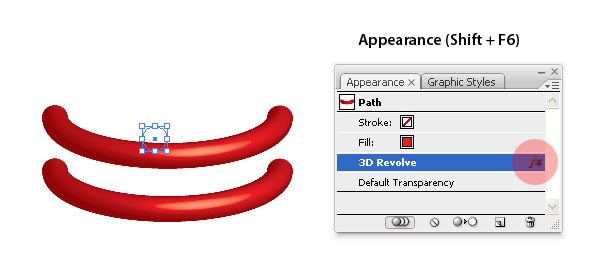
Step 5
In the 3D Revolve dialog box, change the z-axis value to 10 and offset to Left Edge. Keep rest of the values as it is. The two basic elements for the spring are now created.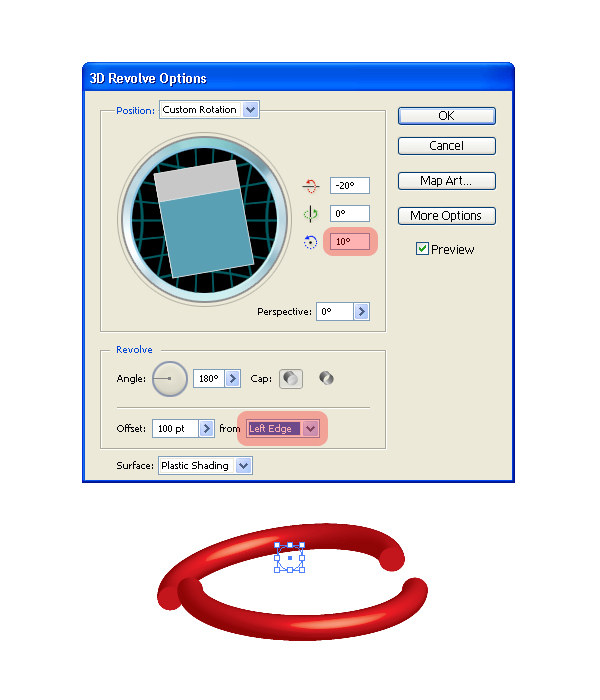
Step 6
Now we’ll match the faces. Hold the duplicate copy and place it exactly behind the right face of the original one. Use the keyboard arrow keys to do so. See in the image below how this is done.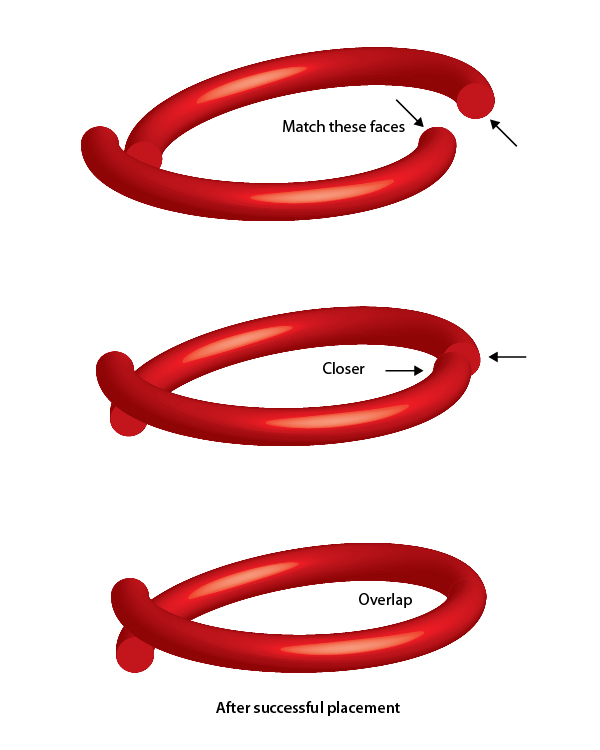
Step 7
Select the rings and Alt-drag to duplicate. Send “ring 4″ to back (Command + Shift + Left Bracket key).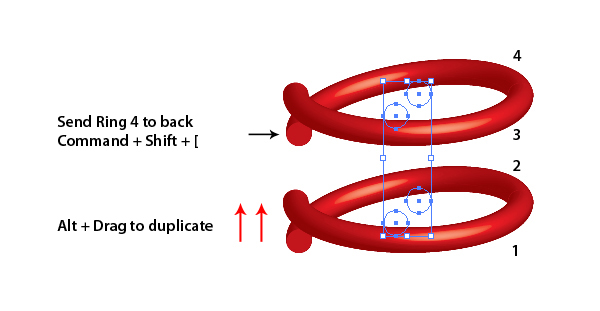
Step 8
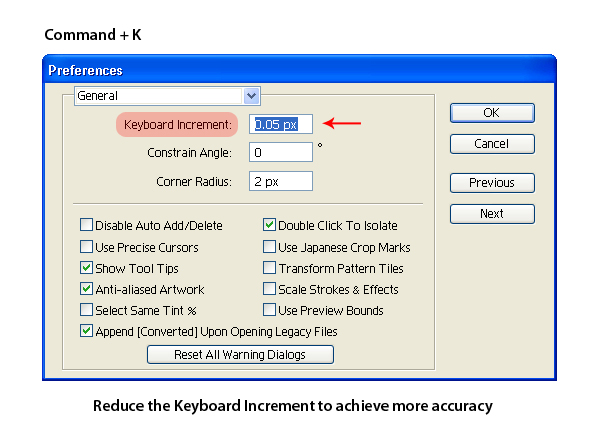
Now select “ring3″ and “ring 4,” then match the left face of “ring 4″ exactly behind the left face of “ring1.”Tip: Use Shift + Arrow key for larger increments and simply push the Arrow key for normal increments. As we know, there is no way to join 3D faces in illustrator; the overall quality of the final result will depend upon your hand’s precision. So, try your best to match the faces.
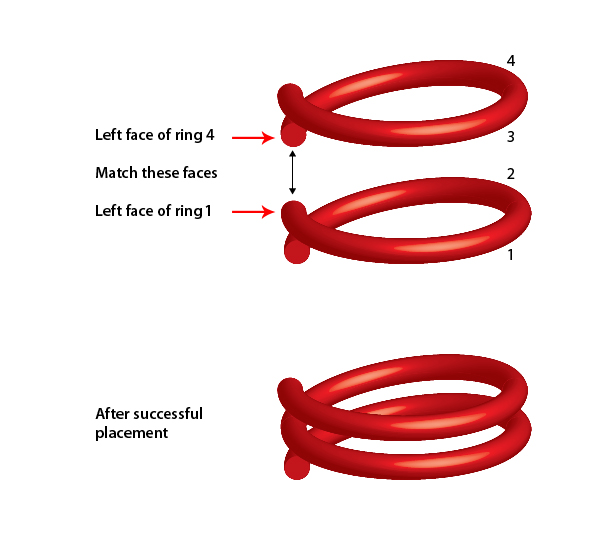
Step 9
Follow Steps 7 and 8 to extend the spring. This can be done either by duplicating one ring at a time, or duplicating the entire set of rings. Let’s do it with an entire set. Select everything and Alt-drag to duplicate. Send “ring 6″ to back (Command + Shift + Left Bracket).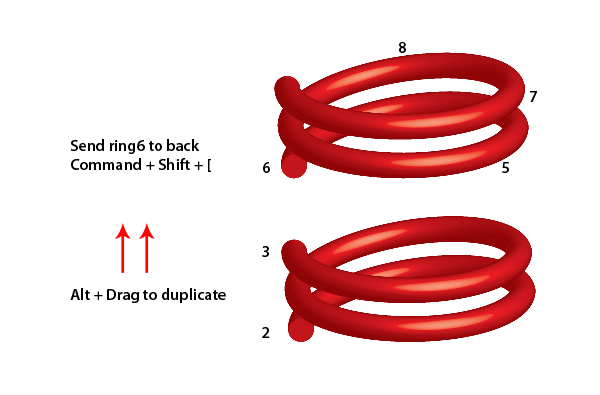
Step 10
Now we have two sets and we have to connect them. Key logic: Match the bottom-most face of “set 2″ with top-most face of “set 1″.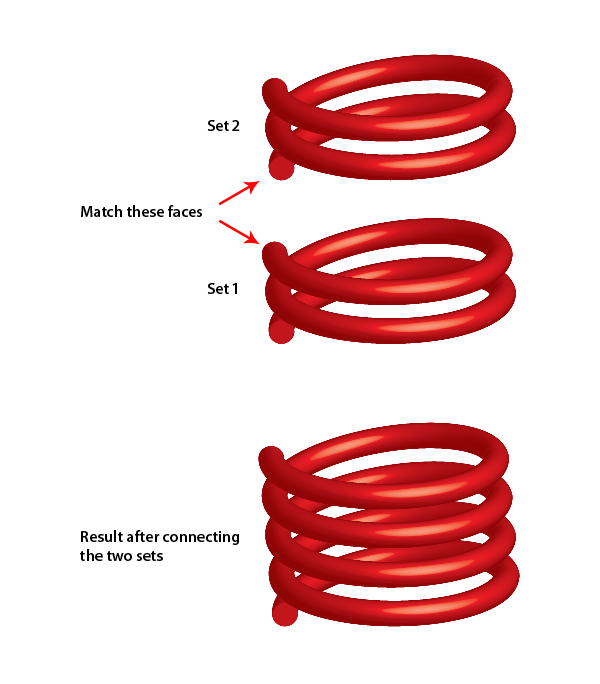
Step 11
Now we want a stretch in the spring. For this, duplicate “ring 8″ by Alt-dragging, and connect it with “ring 7.” Assume this as “ring 10,” as we will make “ring 9″ in the next step.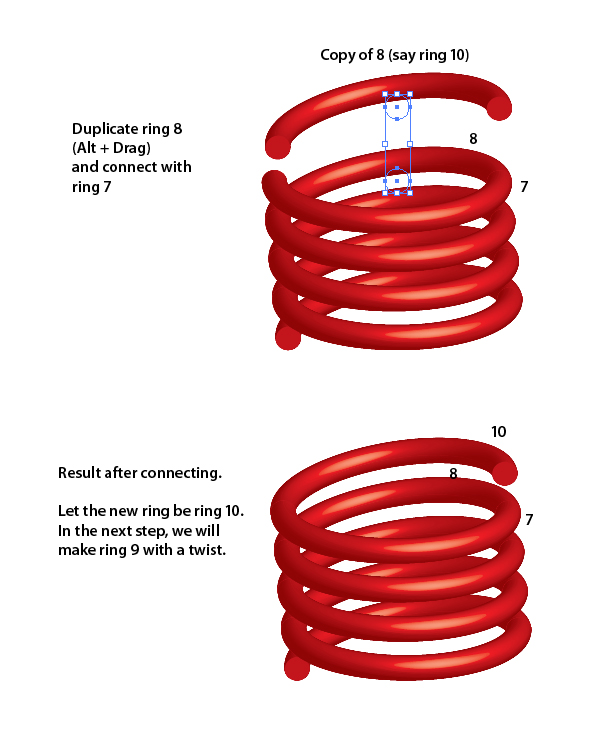
Step 12
Duplicate “ring 7″ by Alt-dragging and open its 3D properties from the Appearance Palette (Shift + F6). Change the z-axis rotation to -4, as shown in the image below.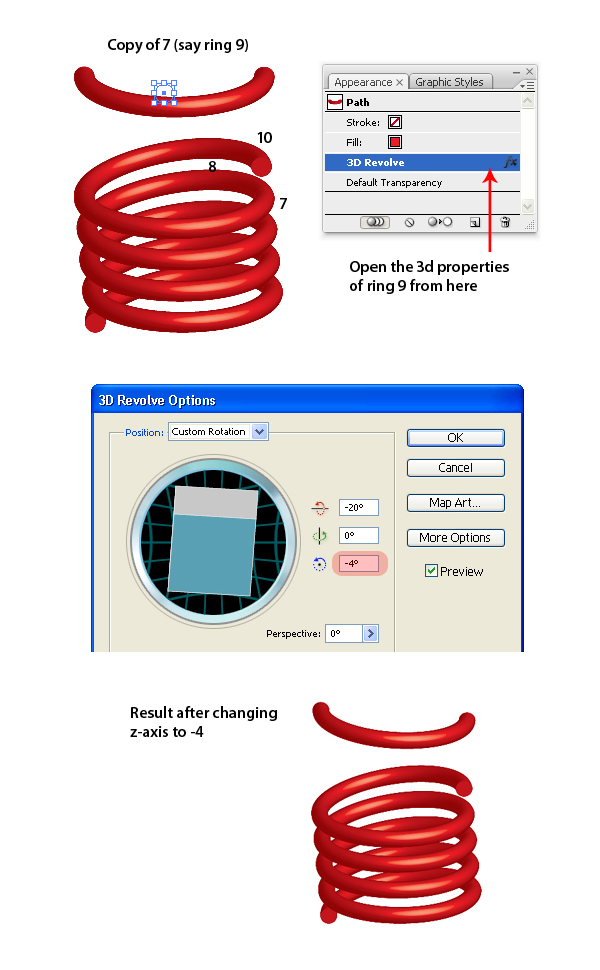
Step 13
Connect “ring 9″ to the right face of “ring 10,” as shown below.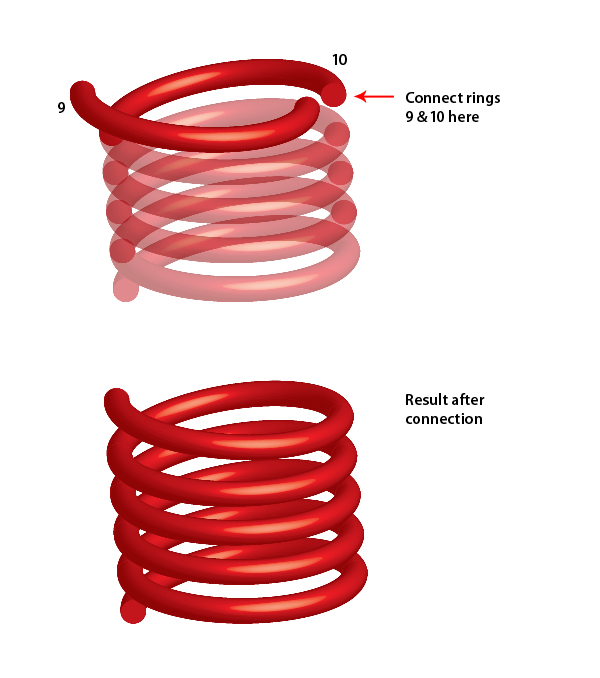
Step 14
Duplicate “ring 10″ and change its z-axis rotation to 14. Do this by clicking on the 3D Revolve properties from the Appearance palette. Next, connect it with the left face of “ring 9,” as shown below.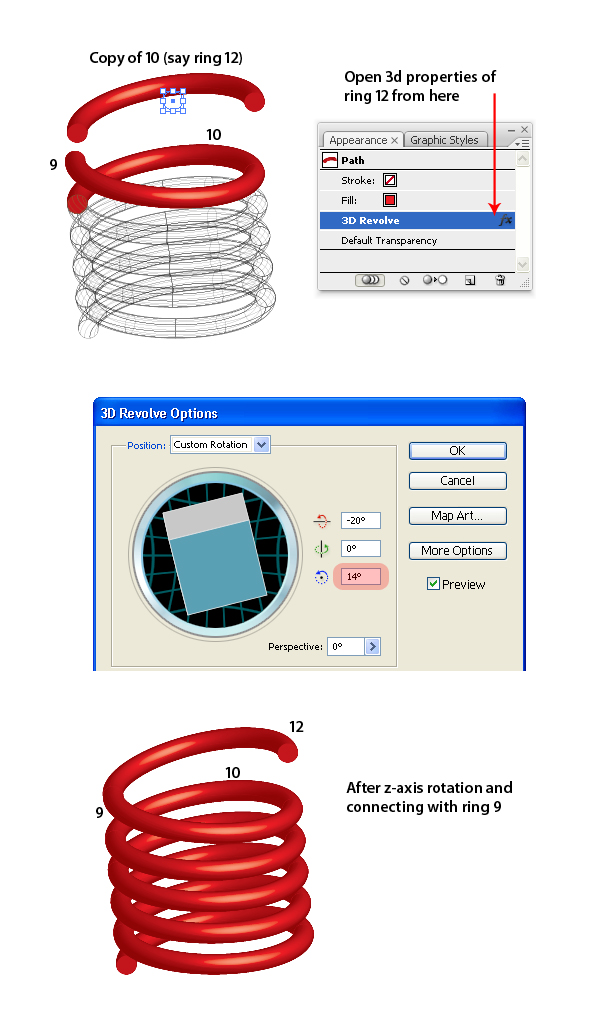
Step 15
Following the same procedure, duplicate “ring 9,” change its z-axis value to -8 and connect its right face to “ring 12.”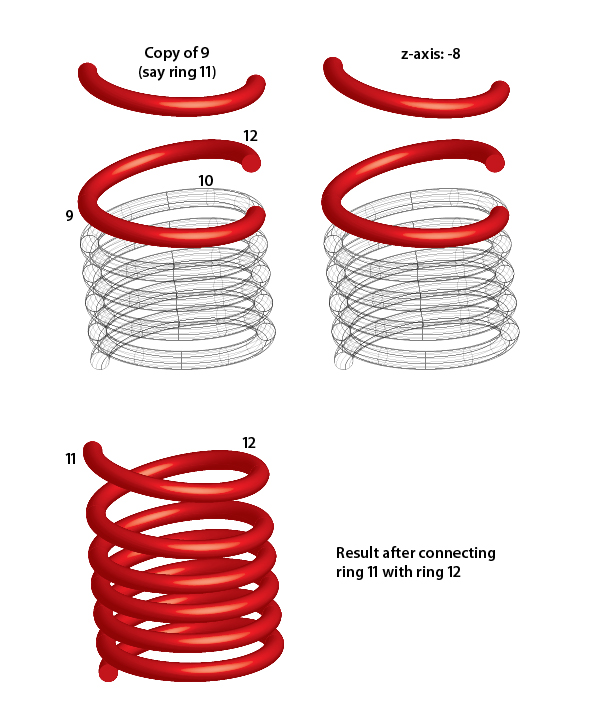
Step 16
Similarly, duplicate “ring 12,” change its z-axis to 18, and connect its left face to “ring 11.”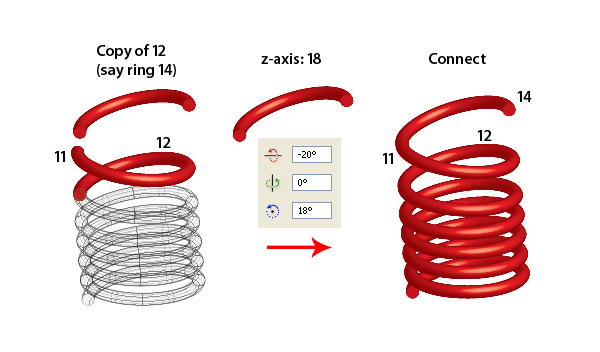
Step 17
Now duplicate “ring 11″ and connect its right face to “ring 14,” without changing anything.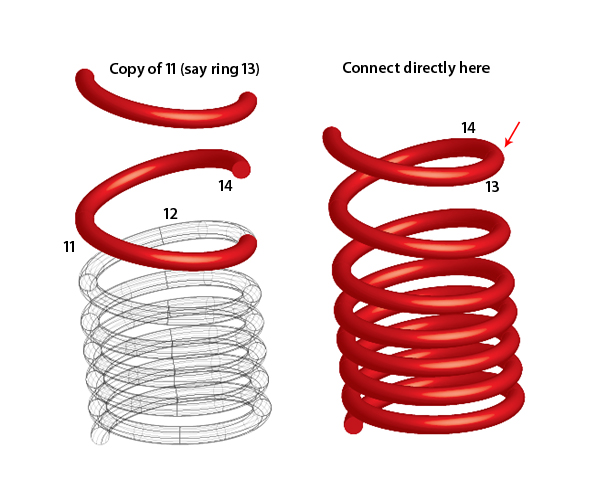
Step 18
Select “rings 13″ and “ring 14″ together and duplicate them. Send “ring 16″ to back (Command + Shift + Left Bracket). Now join the resulting rings at the left face of “ring 13.”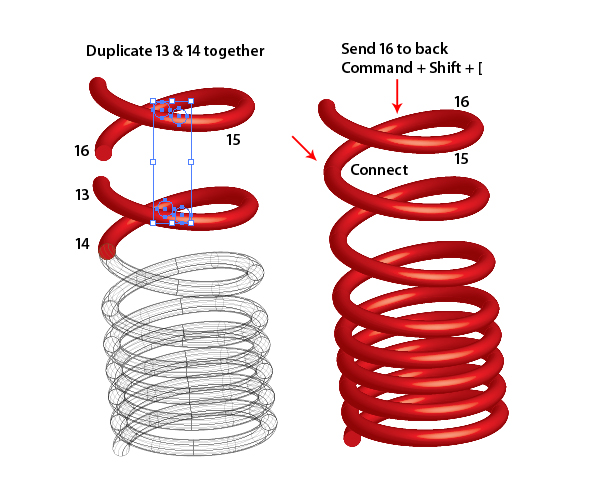
Step 19
Now duplicate “ring 16″ by Alt-dragging and connect it to the left face of “ring 15.”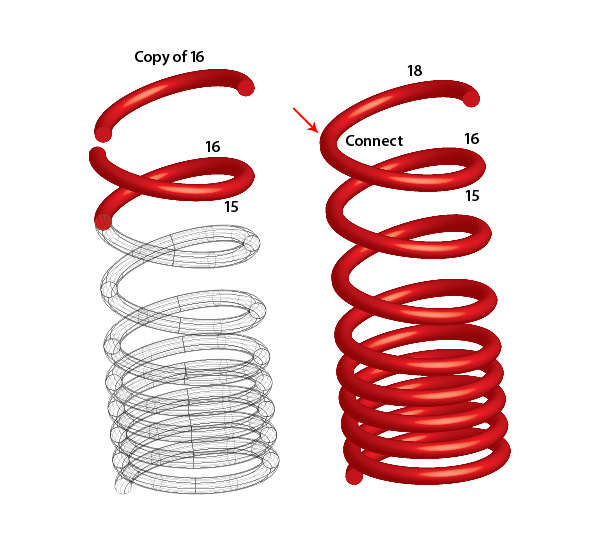
Step 20
Carefully select the rings 1, 3, 4, and 6, then duplicate them. You may need to lock some rings (Command + 2) to select the desired ones.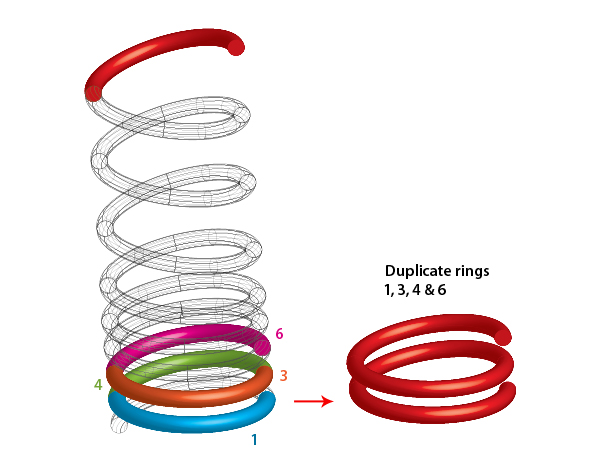
Step 21
The final step is to connect the resultant set of Step 20 to the right face of “ring 18.” The final result after successful placement shall be like this.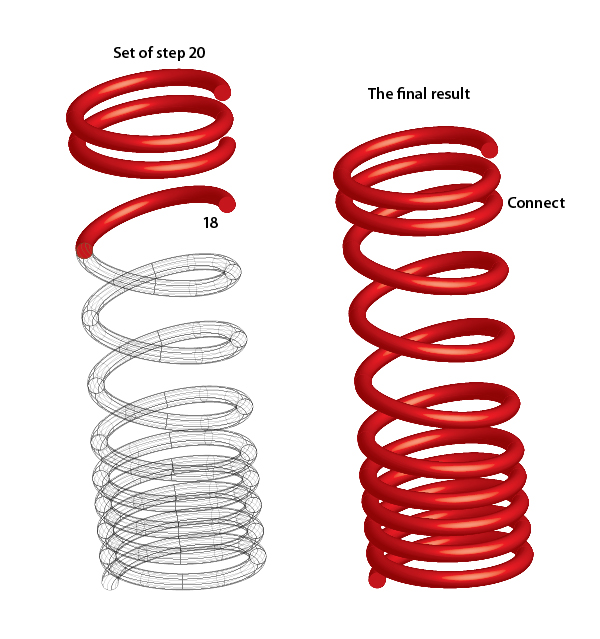
Conclusion and Scope
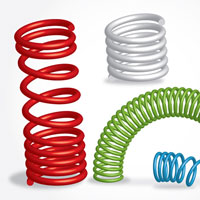
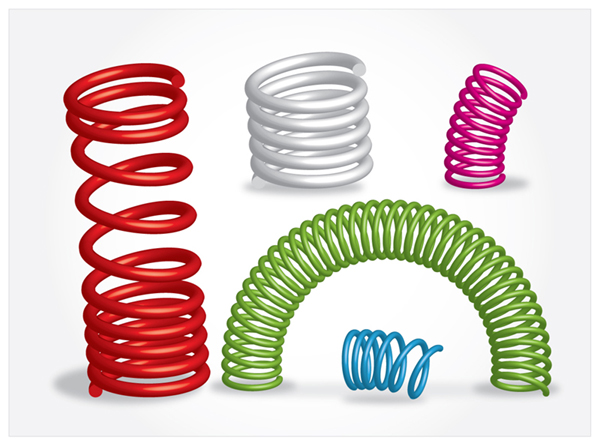
With this basic technique of spring formation, we can obtain creative results by simply experimenting with the rotation values in the 3D Revolve option. The only drawback with this technique is that we can not join the 3D faces. This affects the overall quality of the desired result. However, at 800px sizes, these errors are not legible and we can easily use the results in icon designing. You can try this technique in creating shock-absorbers and Spiral CFL (Bulbs).The image below shows some experiments done with this procedure. You can find the rotation values for each result in the source file. Thanks everybody for your patience and valuable time. Hope you enjoyed this tutorial!
No comments:
Post a Comment