
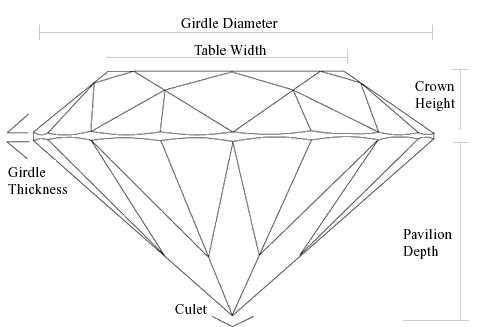
Drawing a vector diamond is pretty simple in Adobe Illustrator. First, let’s do some research on the anatomy of a diamond. We don’t want to do some fancy cut and get rejected by our clients. Here’s a proportional diamond line art taken from the website. We will use this as a guide to help us create a perfect diamond in this Illustrator tutorial.
1. Create a template guide
First, place the line work by going File>Place and select the graphic. Go to Layers Palette and click the arrow to show the menu and select Template. This will lock and make the graphic transparent for easy tracing.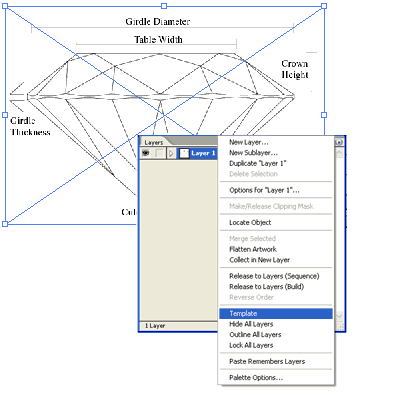
2. Placing a guide in the center
Turn on your Rulers by pressing Ctrl/Command+R. Drag a guide and place it in the center.
Next turn on the Snap to Grid by pressing Shift+Ctrl+”/Shift+Command+” or go Window>Snap to Grid. You will see the grid appear at the background.

3. Tracing the artwork
Create a new layer in your Layer Palette (new layer icon at the bottom of the palette). Using the Pen Tool, start to trace each facet. The points will snap to the grid. Make sure to close each shape and make the points meet in the same spot. Do this until we complete the right half of the diamond. We can turn off Snap to Grid and manually adjust the points to fix the curves which doesn’t snap to the grid very well.
4. Reflecting the diamond
Select the whole half of the diamond. Select Reflect Tool and Alt/Option+click on the center guide line. This will pop up a menu. Select Vertical for Axis and click Copy.
Let’s start combining the center facet. Select both the facets at the bottom and hold Alt/Option+Click and click Add to shape area from Pathfinder (Window>Pathfinder). Repeat this step for the top facets too.


5. Fill the diamond
Select one of the facet and fill it with Linear Gradient. Create a 3rd point in the gradient by clicking in between the 2 points once and make it black. Also turn off the stroke for the facet.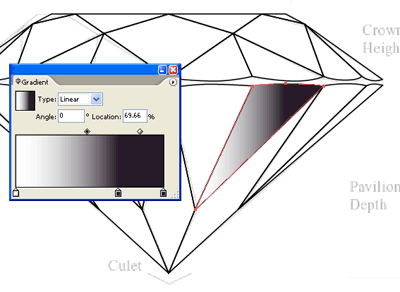
Select the rest of the facets and using the Eye Dropper Tool, click once on the facet we just filled with linear gradient. This will fill the rest with gradient.
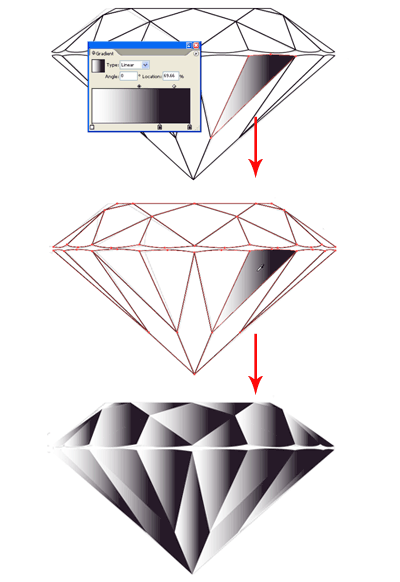
Looks pretty ugly now, so let’s fix that. Select the Gradient Tool and click and drag in different directions for each facet. Do this until you get something below.
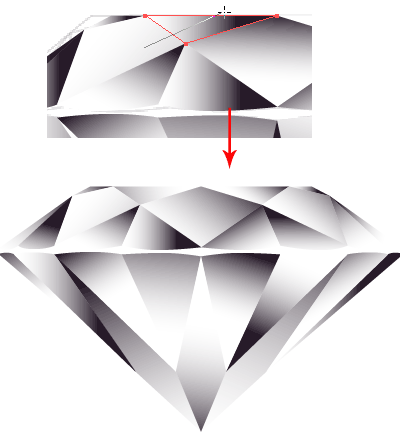
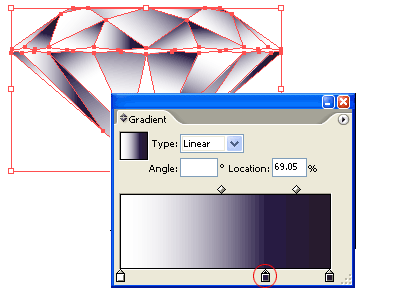
I find the black white gradient looks a bit too harsh. Let’s fix that by selecting all the facets and open both your Gradient and Color Palette. Click once at the middle black point in the Gradient Palette. The Color Palette will show the black color. Change it to a darker blue. This will make the diamond appear cooler. Better now, right?
6. Drawing the girdle
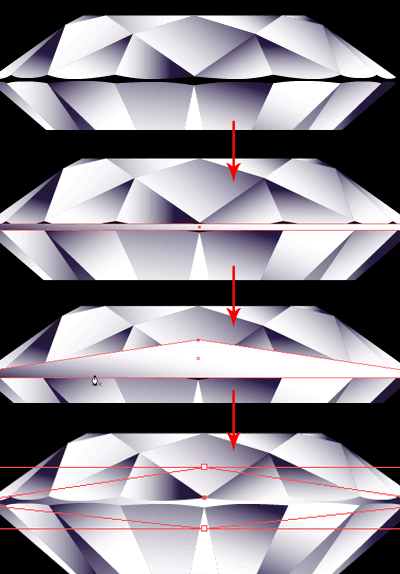
You realise I haven’t draw the girdle( new word I learnt from my research). Select the Rectangle Tool and draw a rectangle that meets all the four points of the girdle’s edges. With the Pen Tool, go near the selected rectangle and click once at the middle of the top line. This will add a new point. Click the Keyword Arrow Key and shift the point upwards. Do this for the bottom too. Once done, Right+Click and select Arrange>Send to Back. This will cover the missing girdle.7. Finishing Touch
How can a diamond do without it’s shining glow and sparkling starburst? So let’s begin to draw a circle and fill it with Radial Gradient from white to black and send it to the back of the diamond.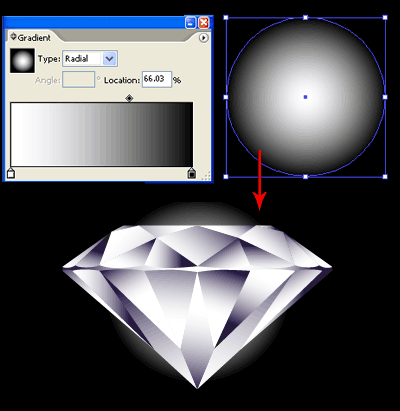
Select the Star Tool and drag a star on the canvas. Without releasing the mouse, press Arrow Up key to add additional points. Hold Ctrl/Command and drag to increase the radius. Try to get a starburst as shown below.


Here’s the final illustration and hope you enjoy cutting your own diamond. If you like my diamond, pls remember to “grade” my 10-carat diamond.

No comments:
Post a Comment