In this tutorial I will show you how to make a vector butterfly using the blending mode from transparency box and the gradient mesh. The techniques shown in this tutorial will help you make shades on objects and liquid transition of colors. Believe me it is very easy.
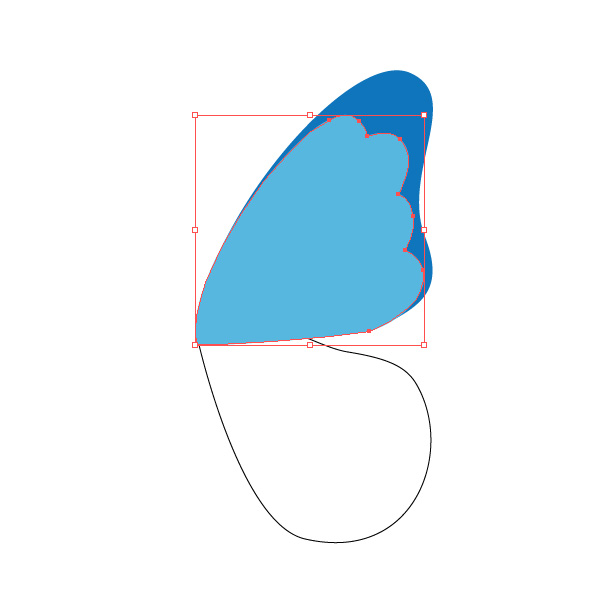 Fill it with light-blue. The colors will be adjusted later on. Copy and Paste in Front the blue shape. Select the blue and light-blue copies, then click Intersect in the Pathfinder palette. Then press Expand.
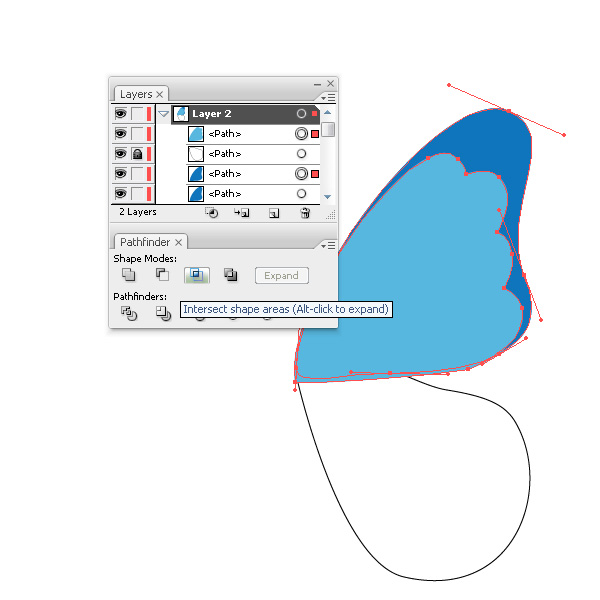 Keeping it selected, click on the button Divide in the Pathfinder palette. Ungroup all the objects.
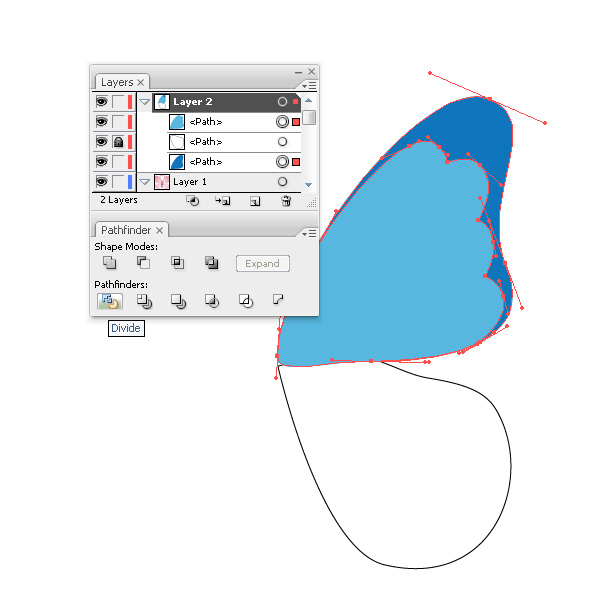
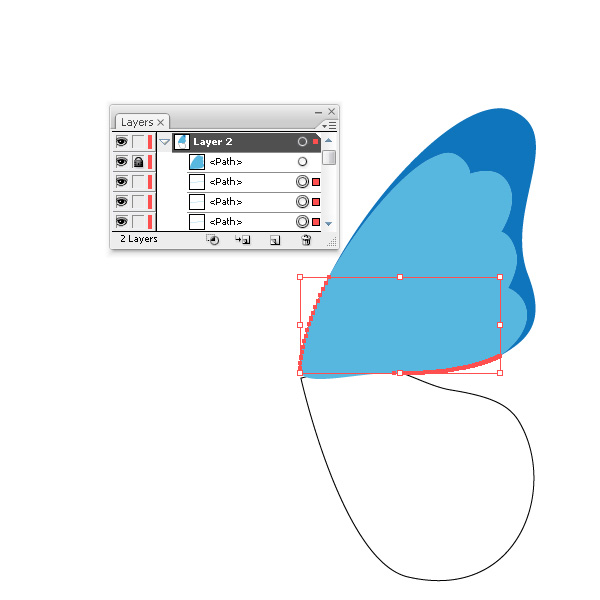 In order to delete them, lock the sub layer with blue and light-blue shape, then use use the Selection Tool (V) select to all the redundant objects, and press the Delete key.
 This procedure is not necessary to conduct. I just do not like it when there are a lot of unnecessary objects in the project. Are you doing well? There is an easier way: if the light-blue shape is open, just click on the button Divide from the Pathfinder palette and there will be no need to do all the further actions.
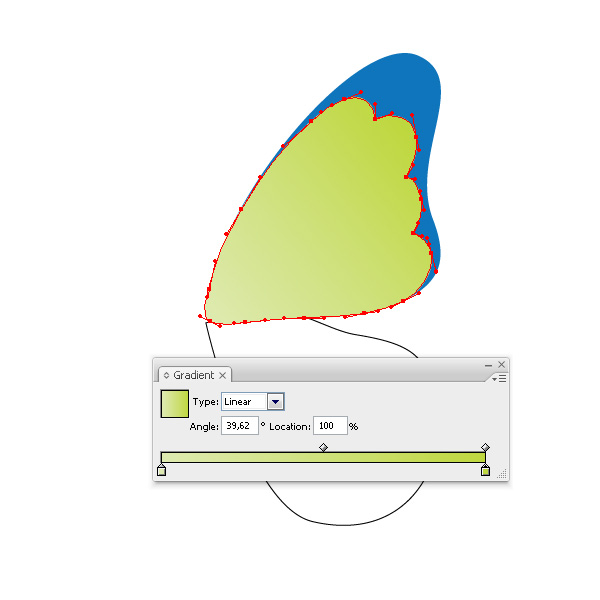
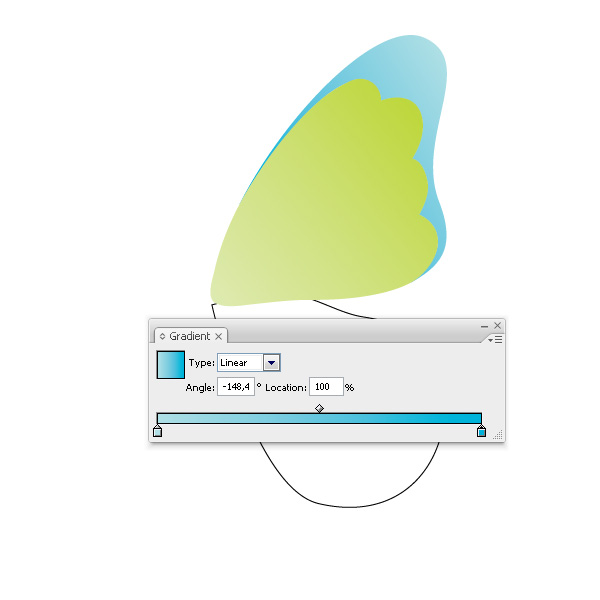
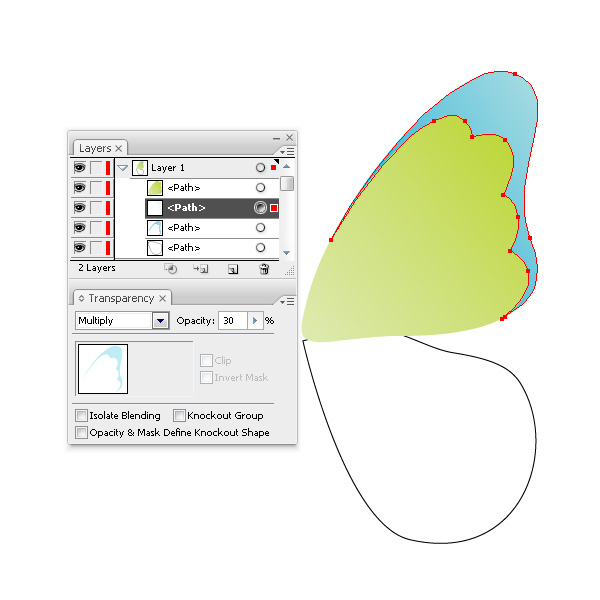
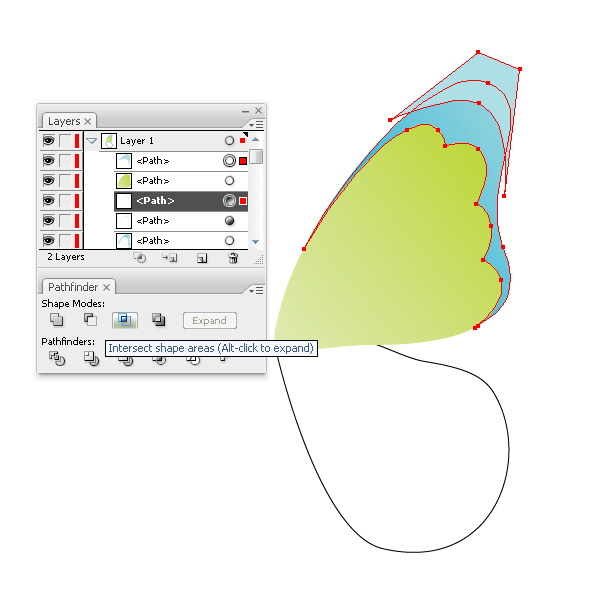
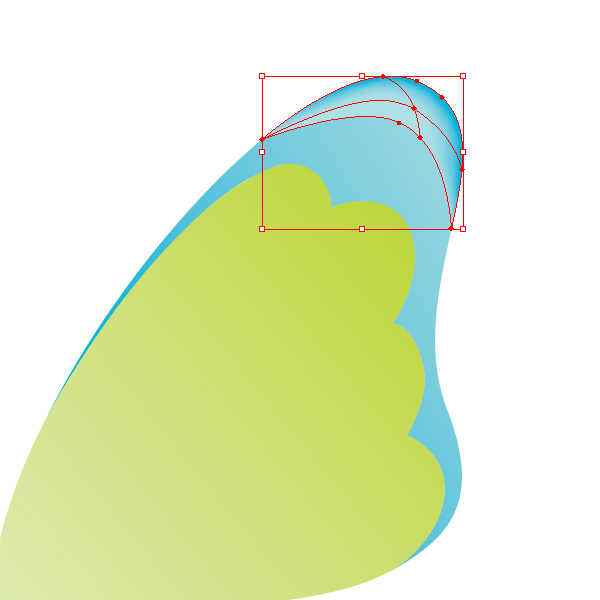 Select the upper points of the Mesh using the Direct Selection Tool (A) and change their color to blue. And following is the secret of success. In order to reach the liquid transition of colors, make the lower points of the mesh white. The idea is that a white color during the converting of the Blending Mode from Normal to Multiply turns into transparent. Select the whole shape by using the Selection Tool (V) and set the Blending Mode and Opacity as shown.
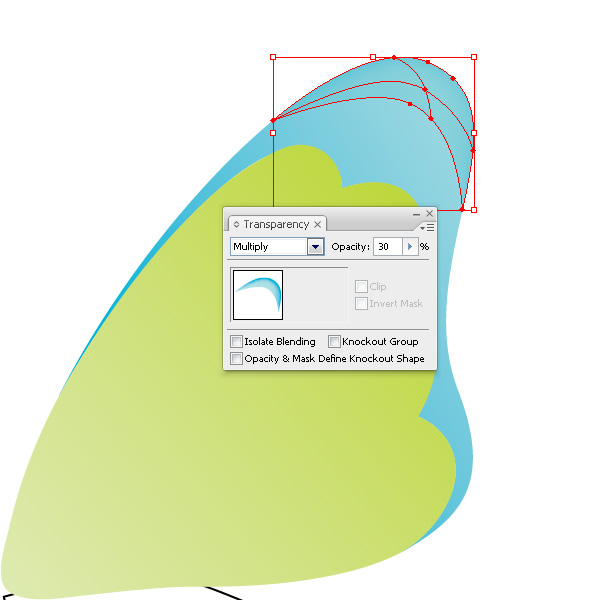
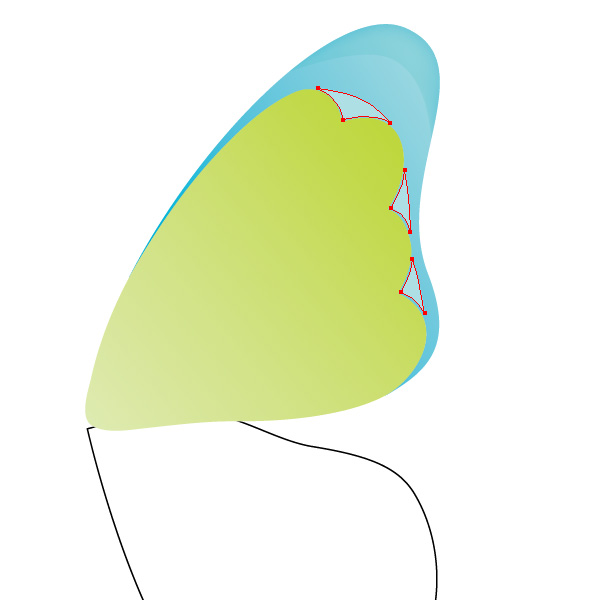
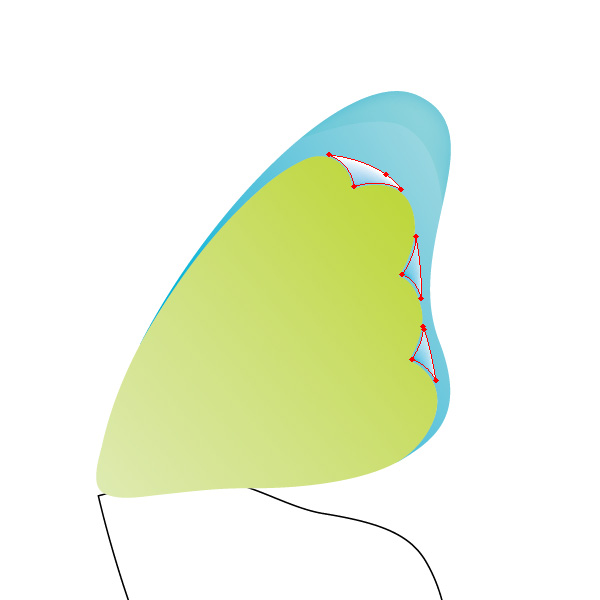
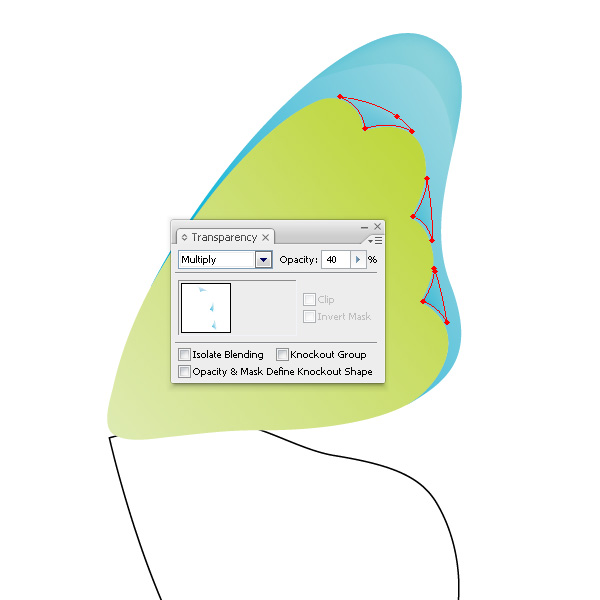
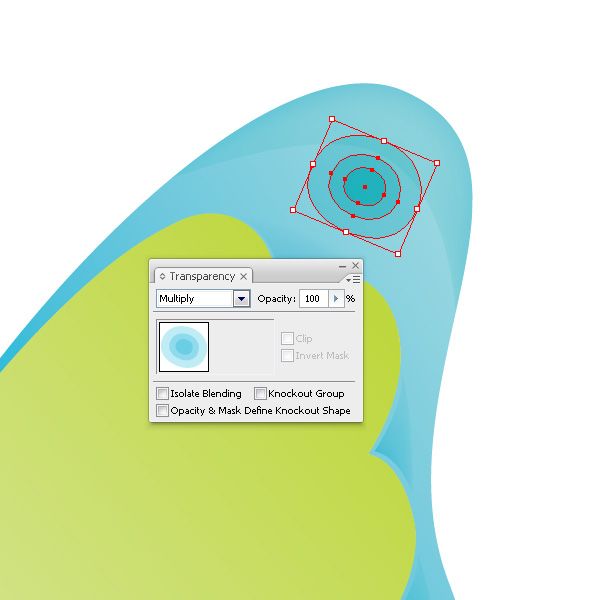 Add a few more ellipses of varying transparency on the wing.
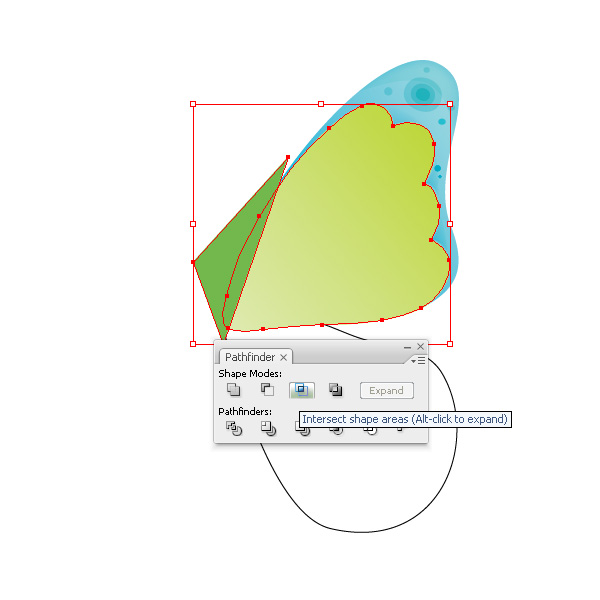
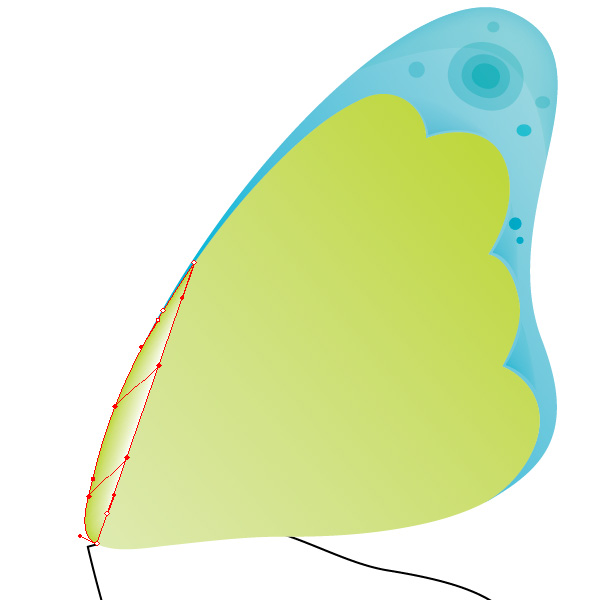
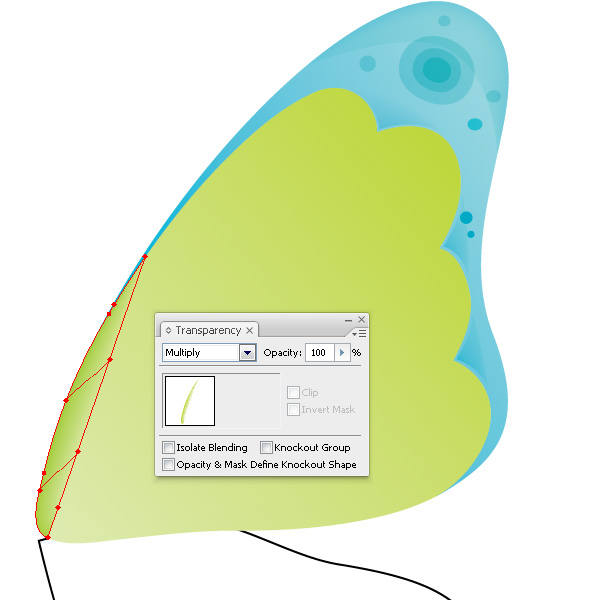
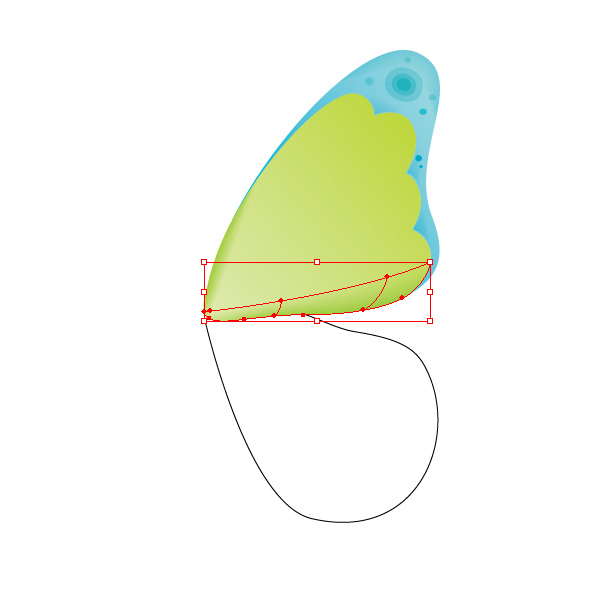
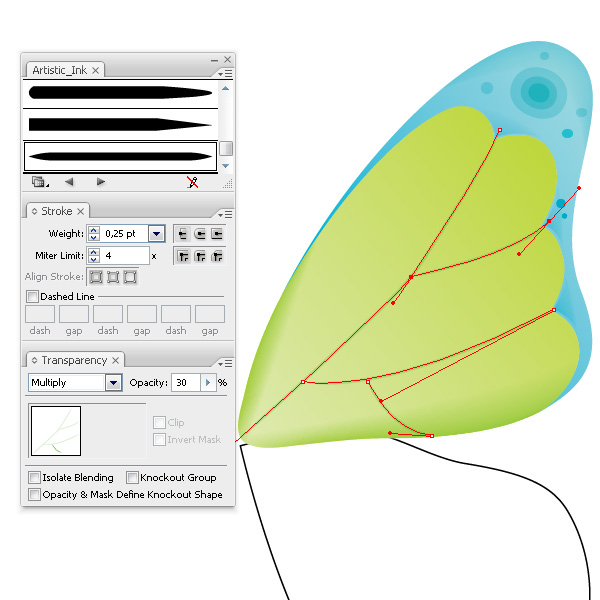
Change it into a green color near the vein points and leave the rest black. Now select all the objects with the Gradient Mesh and set up the Blending Mode and Opacity as shown.

Step 1
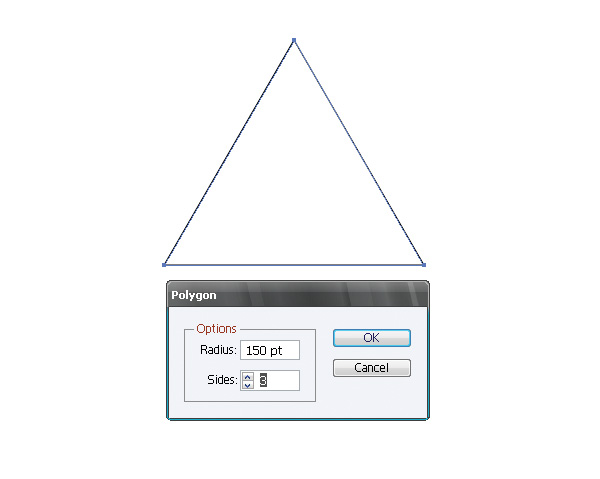
Let’s start with creating a butterfly wing. Open up a new document and select the Polygon Tool, and use it to create a triangle. Apply the settings you see below. I usually use simple shapes and then transform them into complex ones; you can also use the Pen Tool (P) for creating the shape of the wing.
Step 2
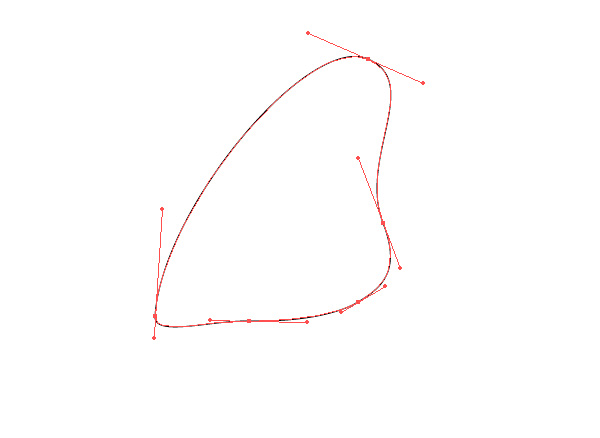
Start the transformation. Convert the corner anchor points to smooth and add new smooth anchor points; deform the shape using the Direct Selection Tool (A). This is how we create the top shape of the butterfly wing.
Step 3
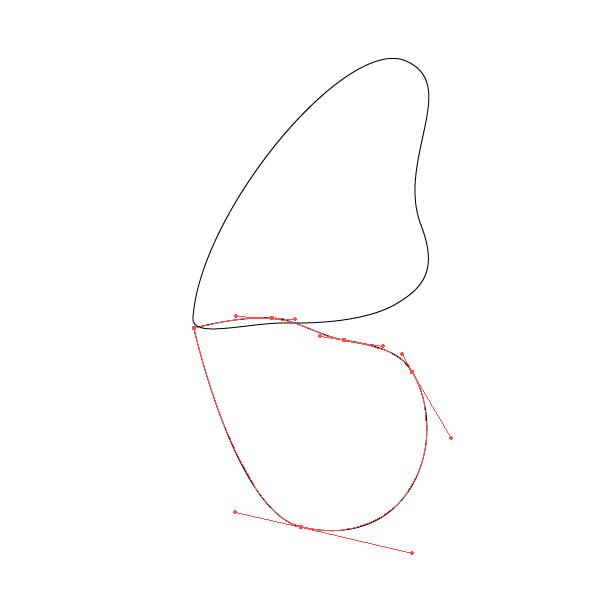
Create the lower part of the wing using the same technique.
Step 4
Use the Pen Tool (P) to create the shape you see in the picture below.


Step 5
As the result of these actions we have a lot of redundant objects.
Step 6
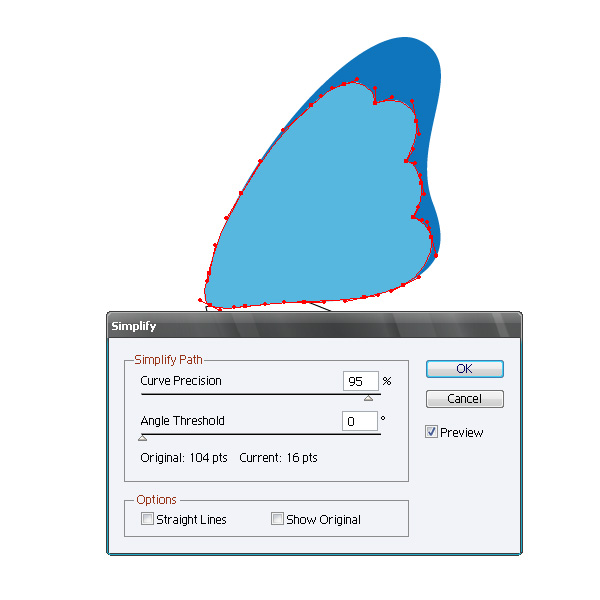
The light blue shape has a lot of anchor points. If you want to reduce their amount go to Object > Path > Simplify, and apply the settings you see below.
Step 7
Fill the upper shape with a linear gradient that starts from light green to green, as shown on the picture below.
Step 8
Fill the lower shape with a linear gradient that starts with a light blue and goes to blue as shown.
Step 9
Copy the lower shape and Paste in Front. Fill the shape with a solid light blue color. Now change the Blending Mode and Opacity from the Transparency palette as shown below.
Step 10
Let’s create the darkening on the top of the butterfly wing. Use the Pen Tool (P) to create the shape shown below. Copy and Paste in Front the light blue shape. Now select this copy and the newly created shape, then click on Intersect from the Pathfinder palette. Then press Expand.
Step 11
Use the Mesh Tool (U) to create the gradient mesh shown below.

Step 12
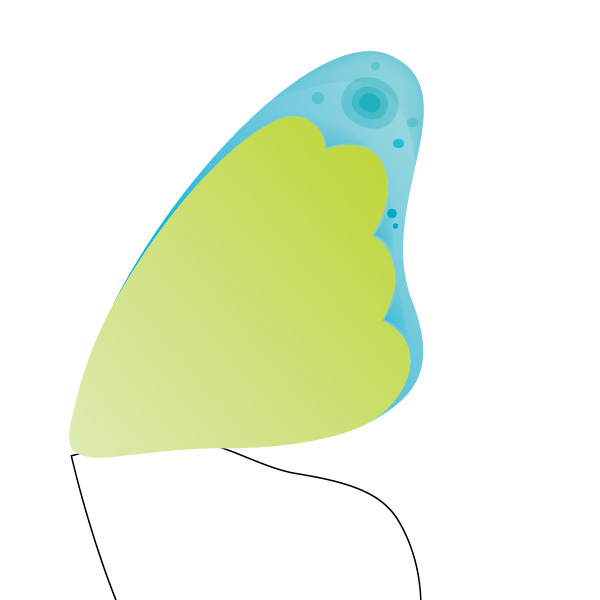
Now create a few more shades of blue color on the wing. Use the previously described techniques.


Step 13
Use the Ellipse Tool (L) to create a few concentric ellipses.

Step 14
Now let’s create the shading of the green color on the left and bottom part of the wing. Use the technique described in the previous steps.


Step 15
Start creating the veins on the wing. Open up the Brushes box: Window > Brushes and go to Open Brush library > Artistic > Artistic Ink and select Tapered Stroke. Apply a green color for the stroke and create the veins using the Pen Tool (P). Apply the settings you see below.
Step 16
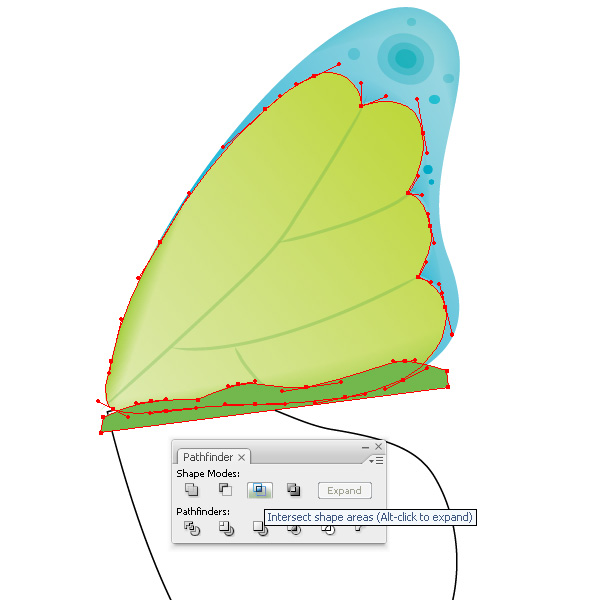
Create a wavy image in the lower part of the wing. Select the Pen Tool (P) and create a wavy shape of a green color. Using Intersect from the Pathfinder to cut it out in the shape of a wing.
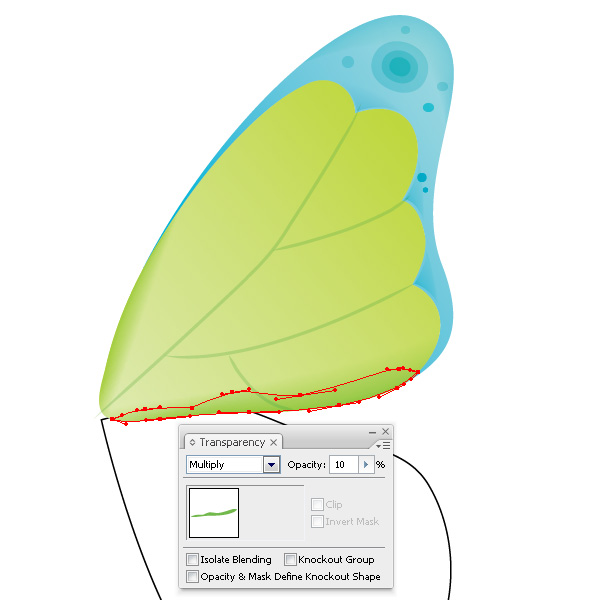
Step 17
Now change the settings of the Blending Mode and Opacity from the Transparency palette as shown.
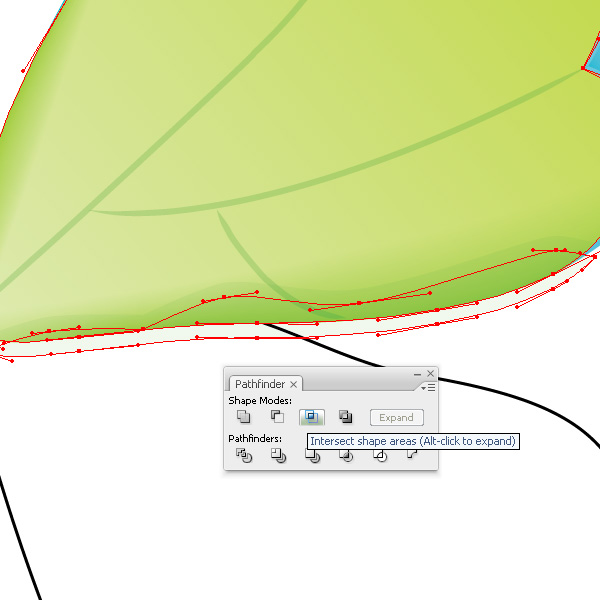
Step 18
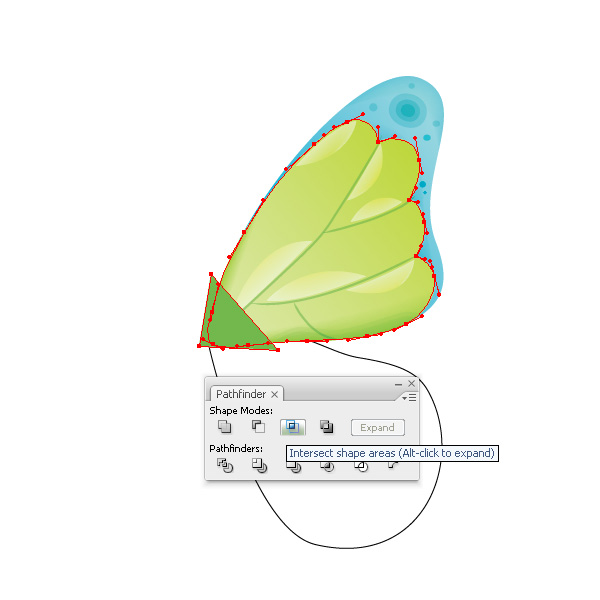
Copy the created shape and Paste it in Front. Then move it a little bit down using the Selection Tool (V). Cut out the copy in the shape of a wing.
Step 19
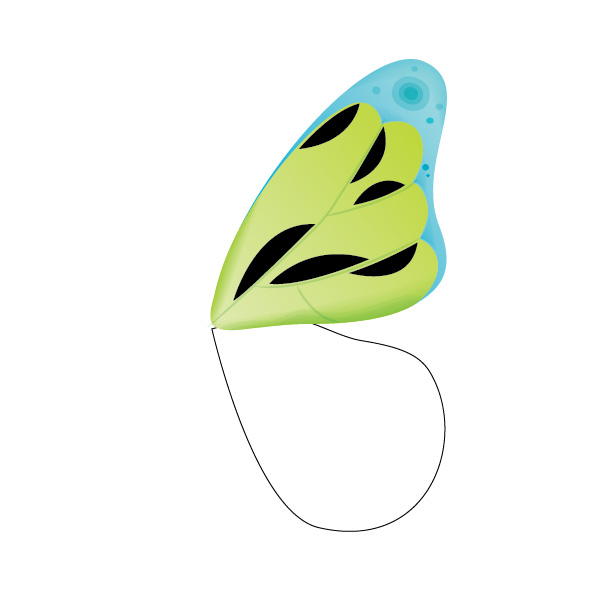
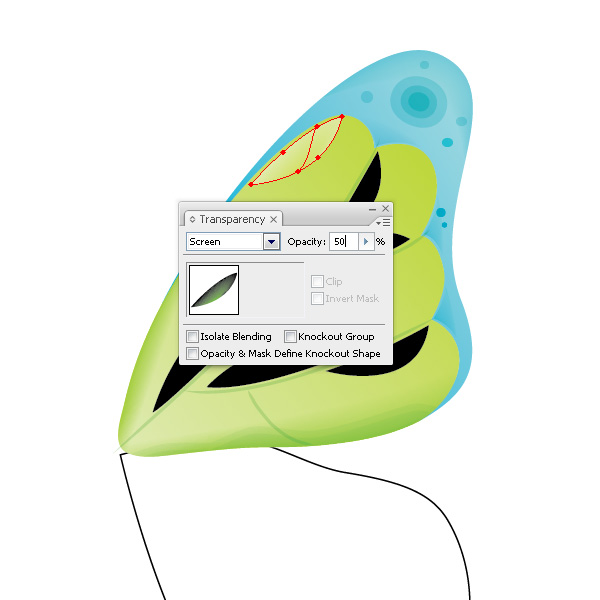
Create the highlights on the wings. Select the Pen Tool (P) and create the shapes with black fills that have no stroke. Such elements have to show the structure of the wing.
Step 20
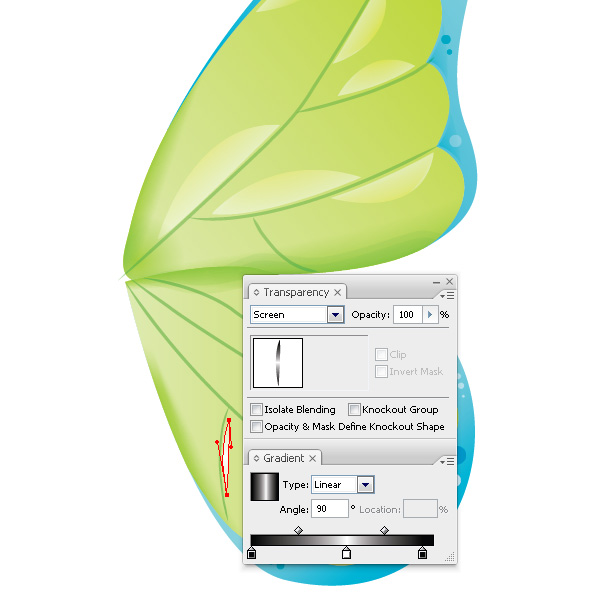
Select each object and create the Gradient Mesh for it using the appropriate tool. Gradient Mesh has to be as simple as possible – put the point on one of the sides of the selected shape. If the Gradient Mesh is not as desired, one can undo the previous actions by pressing keys Command + Z.Change it into a green color near the vein points and leave the rest black. Now select all the objects with the Gradient Mesh and set up the Blending Mode and Opacity as shown.

Step 21
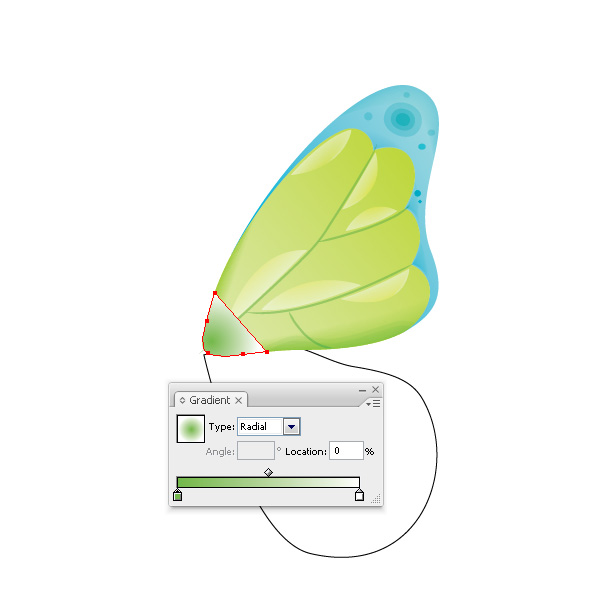
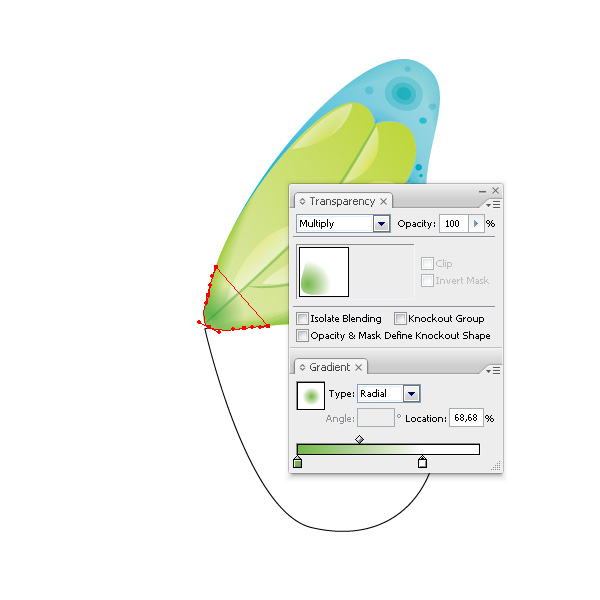
Now create the liquid transition of the color in the lower corner of the wing. Use the technique described above, but now instead of the Gradient Mesh use the radial gradient starting with green to white.


Step 22
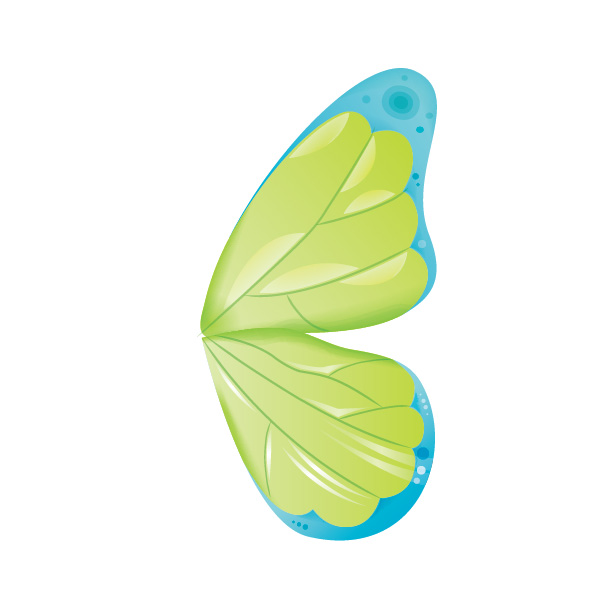
Create the lower part of the wing applying the achieved knowledge.

Step 23
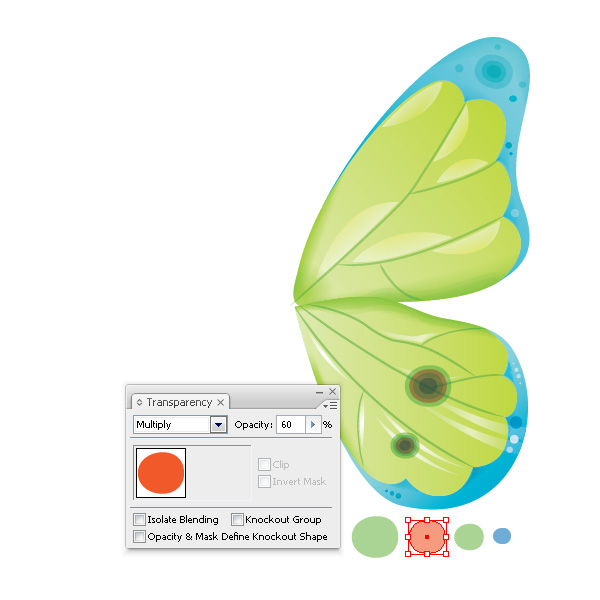
Make up a pattern on the lower part of the wing as shown in Step 13. Fill the ellipses with different colors, change the Blending Mode – have fun experimenting.
Step 24
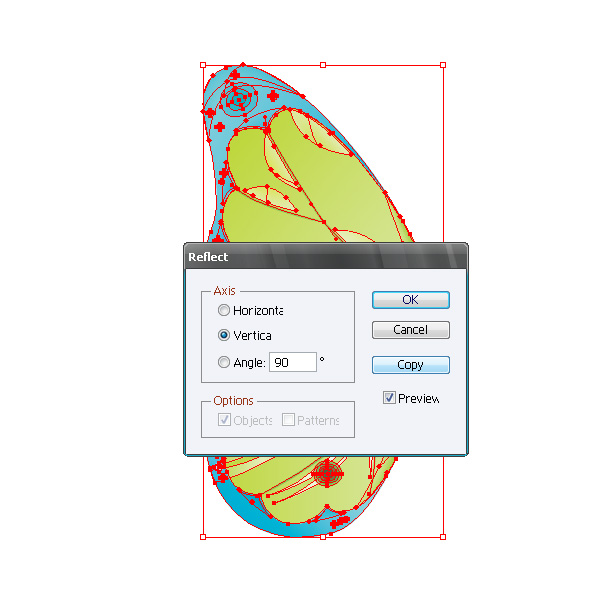
The wing is finished. Let’s create another one. Select all the objects of the wing using the Selection Tool (V) or Lasso Tool (Q) and go to Object > Transform > Reflect… Apply the settings you see below.
Step 25
Move the copy of the wing to the left using the Selection Tool (V) while pressing the Shift key to constrain the movement.
Step 26
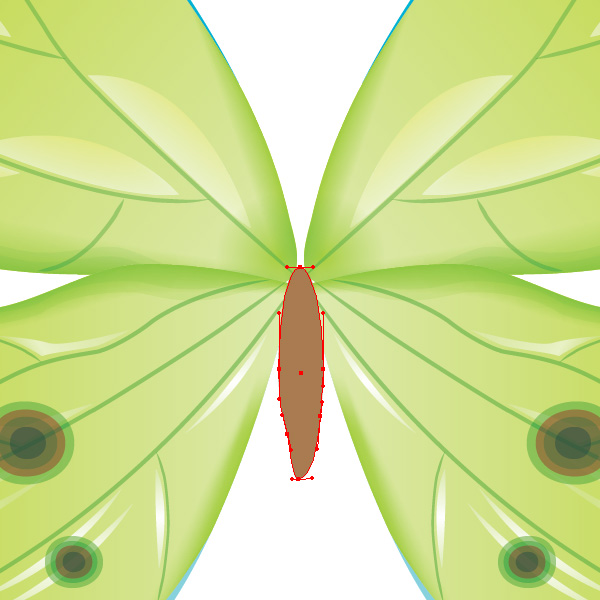
Create the body of the butterfly. Use the Ellipse Tool (L) to create a brown ellipse without stroke. Add the anchor points using the Direct Selection Tool (A).
Step 27
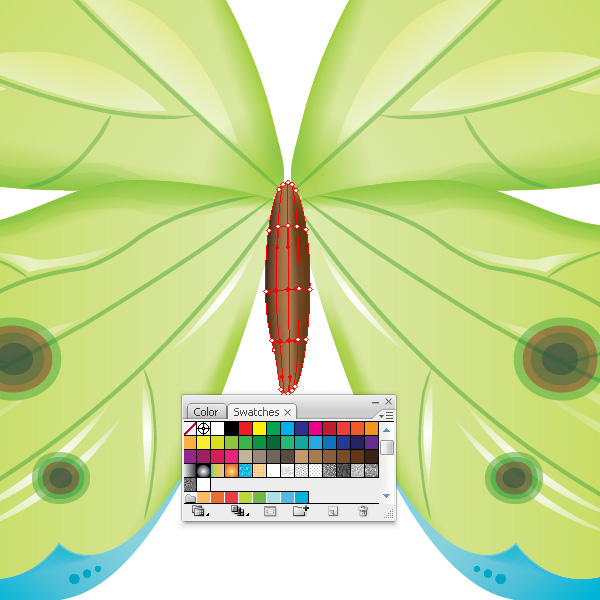
Select the body of the butterfly and create the Gradient Mesh using the Mesh Tool (U). Choose the points on Gradient Mesh and change the colors into different shades of the brown color from the Swatches box, starting with dark on the edges to light towards the center. This is how the volume effect is achieved.
Step 28
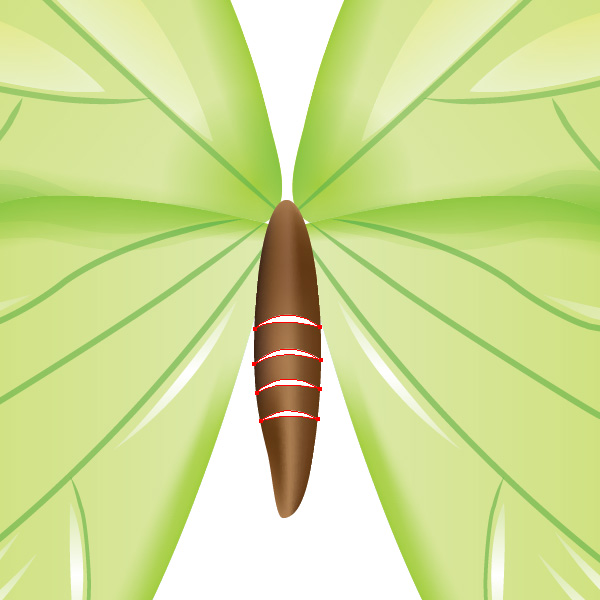
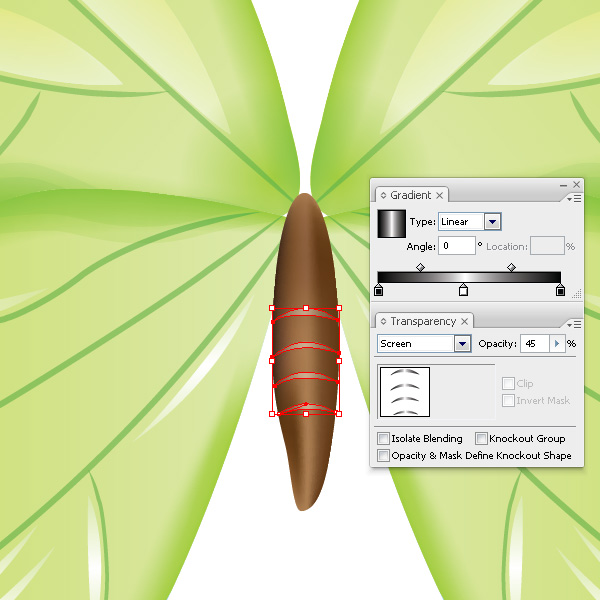
Put the stripes on the body of the butterfly using the Pen Tool (P).
Step 29
Fill the stripes with black and white linear gradients and change the Blending Mode and Opacity from the Transparency palette. Apply the settings you see below.
Step 30
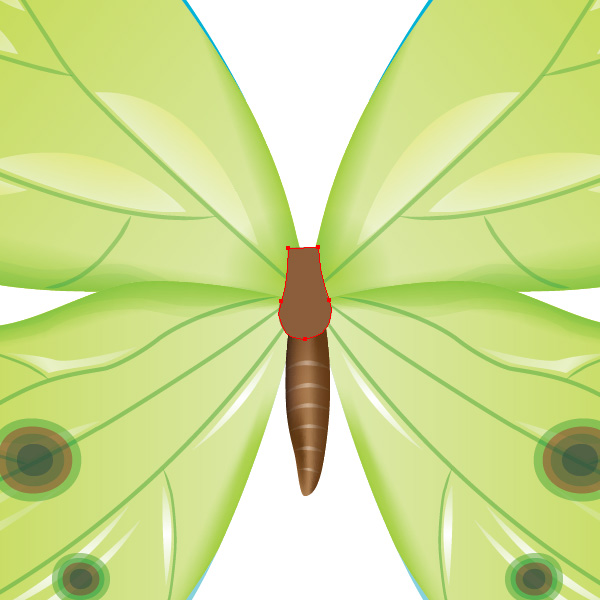
Select the Pen Tool (P) and draw the upper part of the body of the butterfly.
Step 31
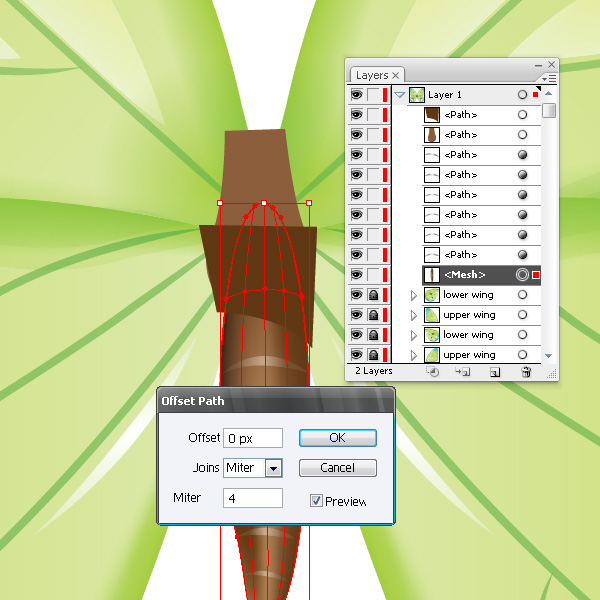
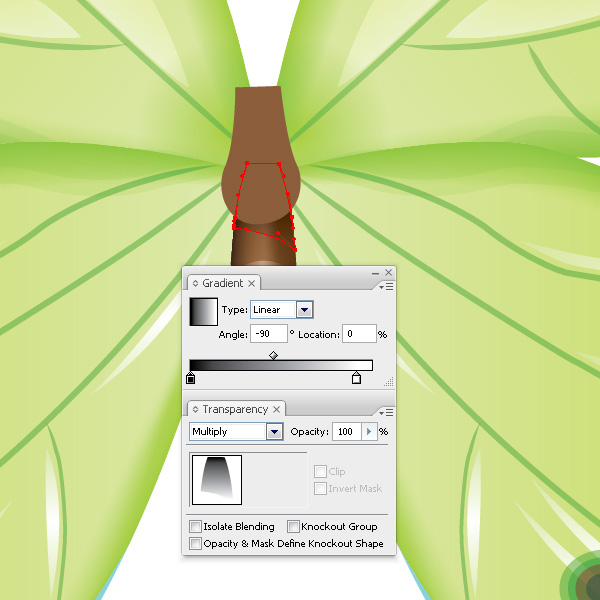
Now create the shade from the upper part on the lower part of the body. Use the Pen Tool (P) to draw the shape of the shade. Select the lower part of the body and go to Object > Path > Offset Path, and apply the settings you see below.
Step 32
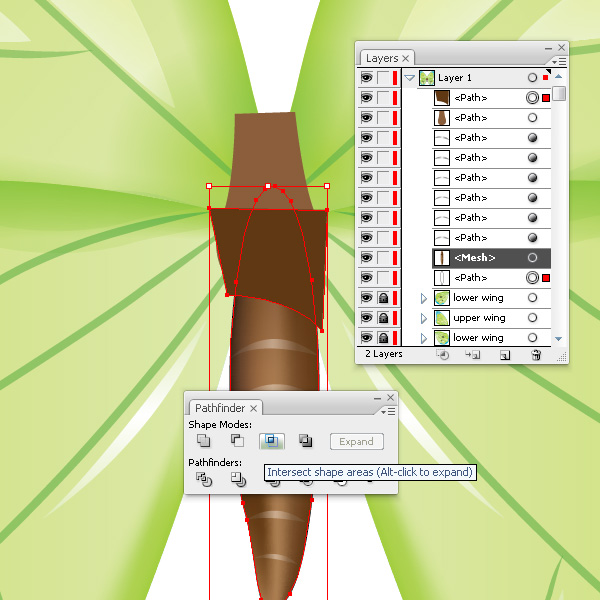
Select the shape of the shade and the created Path and click on Intersect in the Pathfinder palette. Then press Expand.
Step 33
Fill the shape of the shade with a black to white linear gradient and change the Blending Mode and Opacity from the Transparency palette. Apply the settings you see below.
Step 34
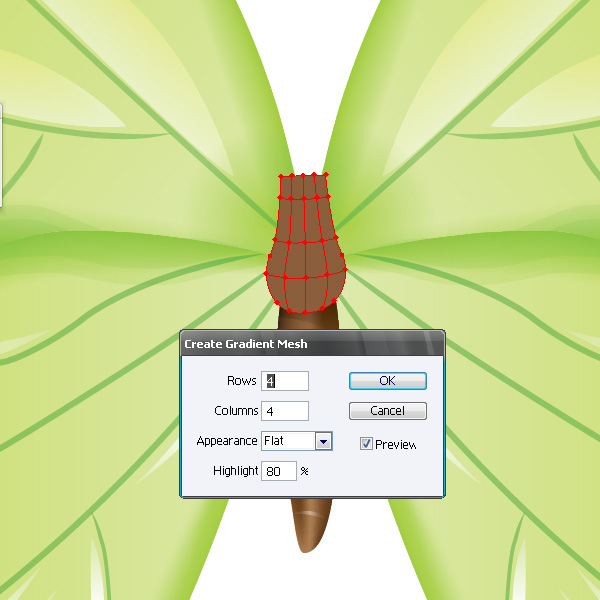
Select the upper part of the body and go to Object > Create Gradient Mesh as shown below.
Step 35
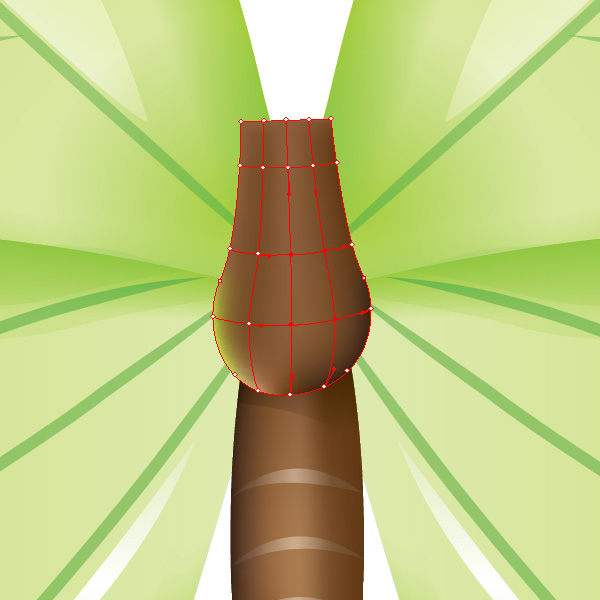
Paint the upper part like the lower one, but I made the left lower point light green – that is the reflected light of the wing.
Step 36
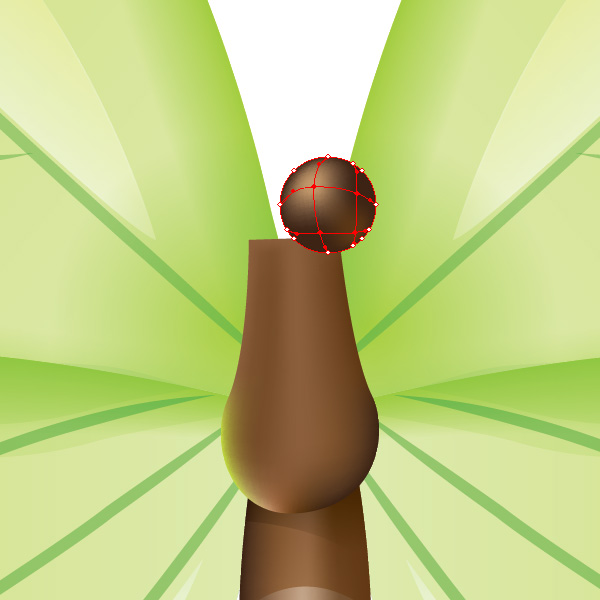
Create the eyes of the butterfly. Use the Ellipse Tool to create the dark-brown circle, while holding the Shift key. Then take the Mesh Tool (U) and create the net as shown. Choose the points and change their color to varying shades of brown.
Step 37
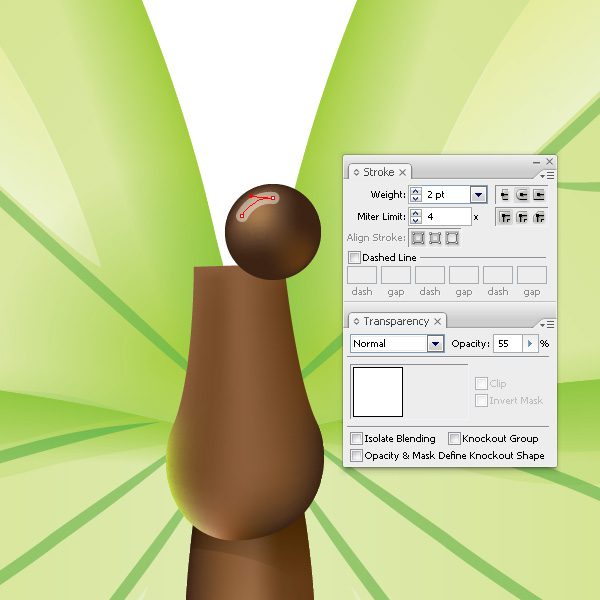
Now create the highlight on the eye with the help of the Pen Tool (P). The stroke weight is 2 pixels. In order to round the edges of the highlighting click on the Round Cap button from stroke palette. Set the Opacity to 55% in the Transparency palette. Group (Command + G) all the eye-elements and double them. Drag the copy to its place as shown. The eyes are ready.
Step 38
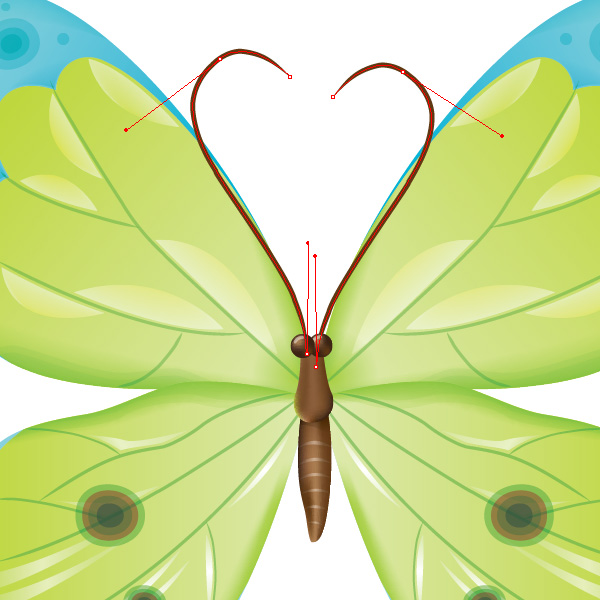
Create the antennae with the help of the Pen Tool (P). Use the same brush for the curves as for the veins on the the wings (see Step 15).
Step 39
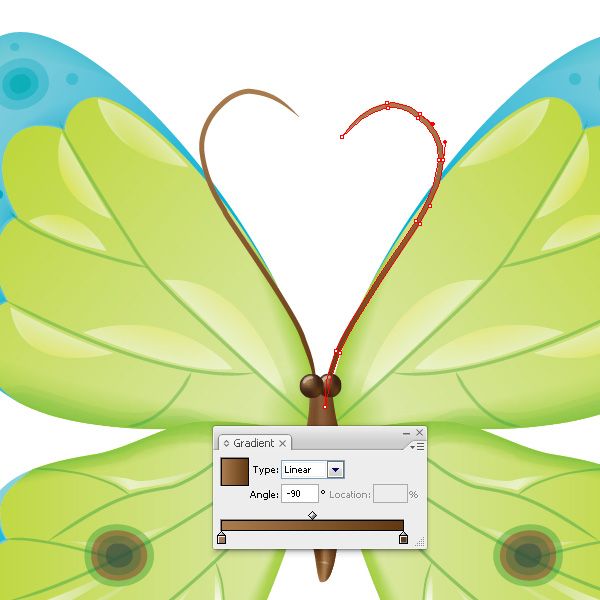
Keeping the antennae selected go to Object > Expand Appearance and fill them with the linear gradient as shown.
Conclusion
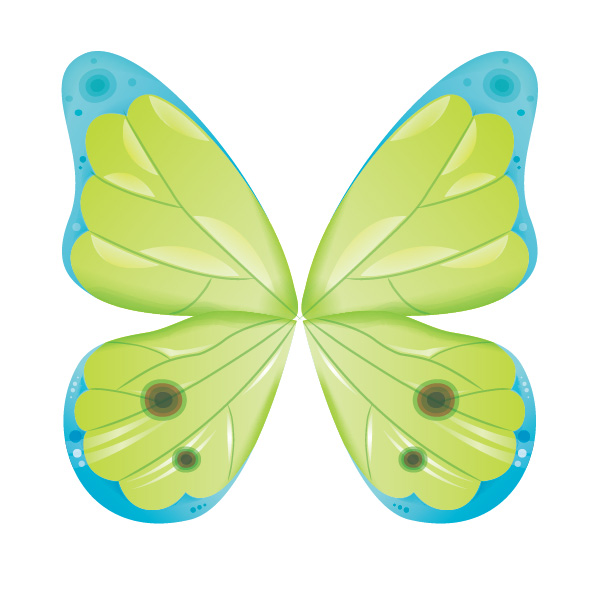
The final image is shown below. Have fun creating your own butterfly. If you want to master this tutorial then be sure to experiment with color. Good luck!

No comments:
Post a Comment